- Development
-
-
- Menu Item
 Visual Development
Build powerful business apps for automation, decision-making, and customer service using an intuitive, visual drag-and-drop interface.
- Data model
Develop data models that support data types of any complexity and structure them in arrays, maps, JSON objects, or other custom data markups.
- Integrations
Utilize the built-in connector builder to seamlessly connect ProcessMIX applications to various databases, REST/SOAP web services, or even blockchain integration.
- Decision Tables
Create complex business logic and handle a large number of rules simultaneously in tabular format.
- Scorecards
Calculate final scores based on the input parameters of certain characteristics to improve your decision-making.
- PMML
Execute existing models based on Predictive Model Markup Language (PMML) to define statistical and data mining models.
- Version control
Facilitate app development with ProcessMIX version control for code change monitoring, history, reversion, and dev team collaboration.
- Debug and test
Streamline your development process by testing and debugging your app's flows while monitoring their performance at each execution breakpoint. Accelerate your development with easy access to application logs within Processmix, facilitating faster troubleshooting and enhancing your overall development efficiency.
- Deploy and use
Quickly deploy REST/SOAP/scheduled apps in the cloud with a single click using ProcessMIX. Benefit from Docker packaging, Kubernetes service, or AWS cloud support. Export projects as JAR/WAR or Java source code for flexibility in utilizing them according to your software development goals.
- Menu Item
-
-
- Solutions
 Visual Development
 Assignment of risk level and customer category within KYC processes at customer onboarding
 Cross-Sell Offer Calculation for the 12M Client Base
Organization & Subscription
Home is an administrative application where you can create your organization, manage resources and teams, and control the state of a project.
In our back-end low-code platform, Organization is the location where the users have all their available resources – be they projects, teams, environments, and etc. Each organization is associated with an individual subscription.
How to create an organization?
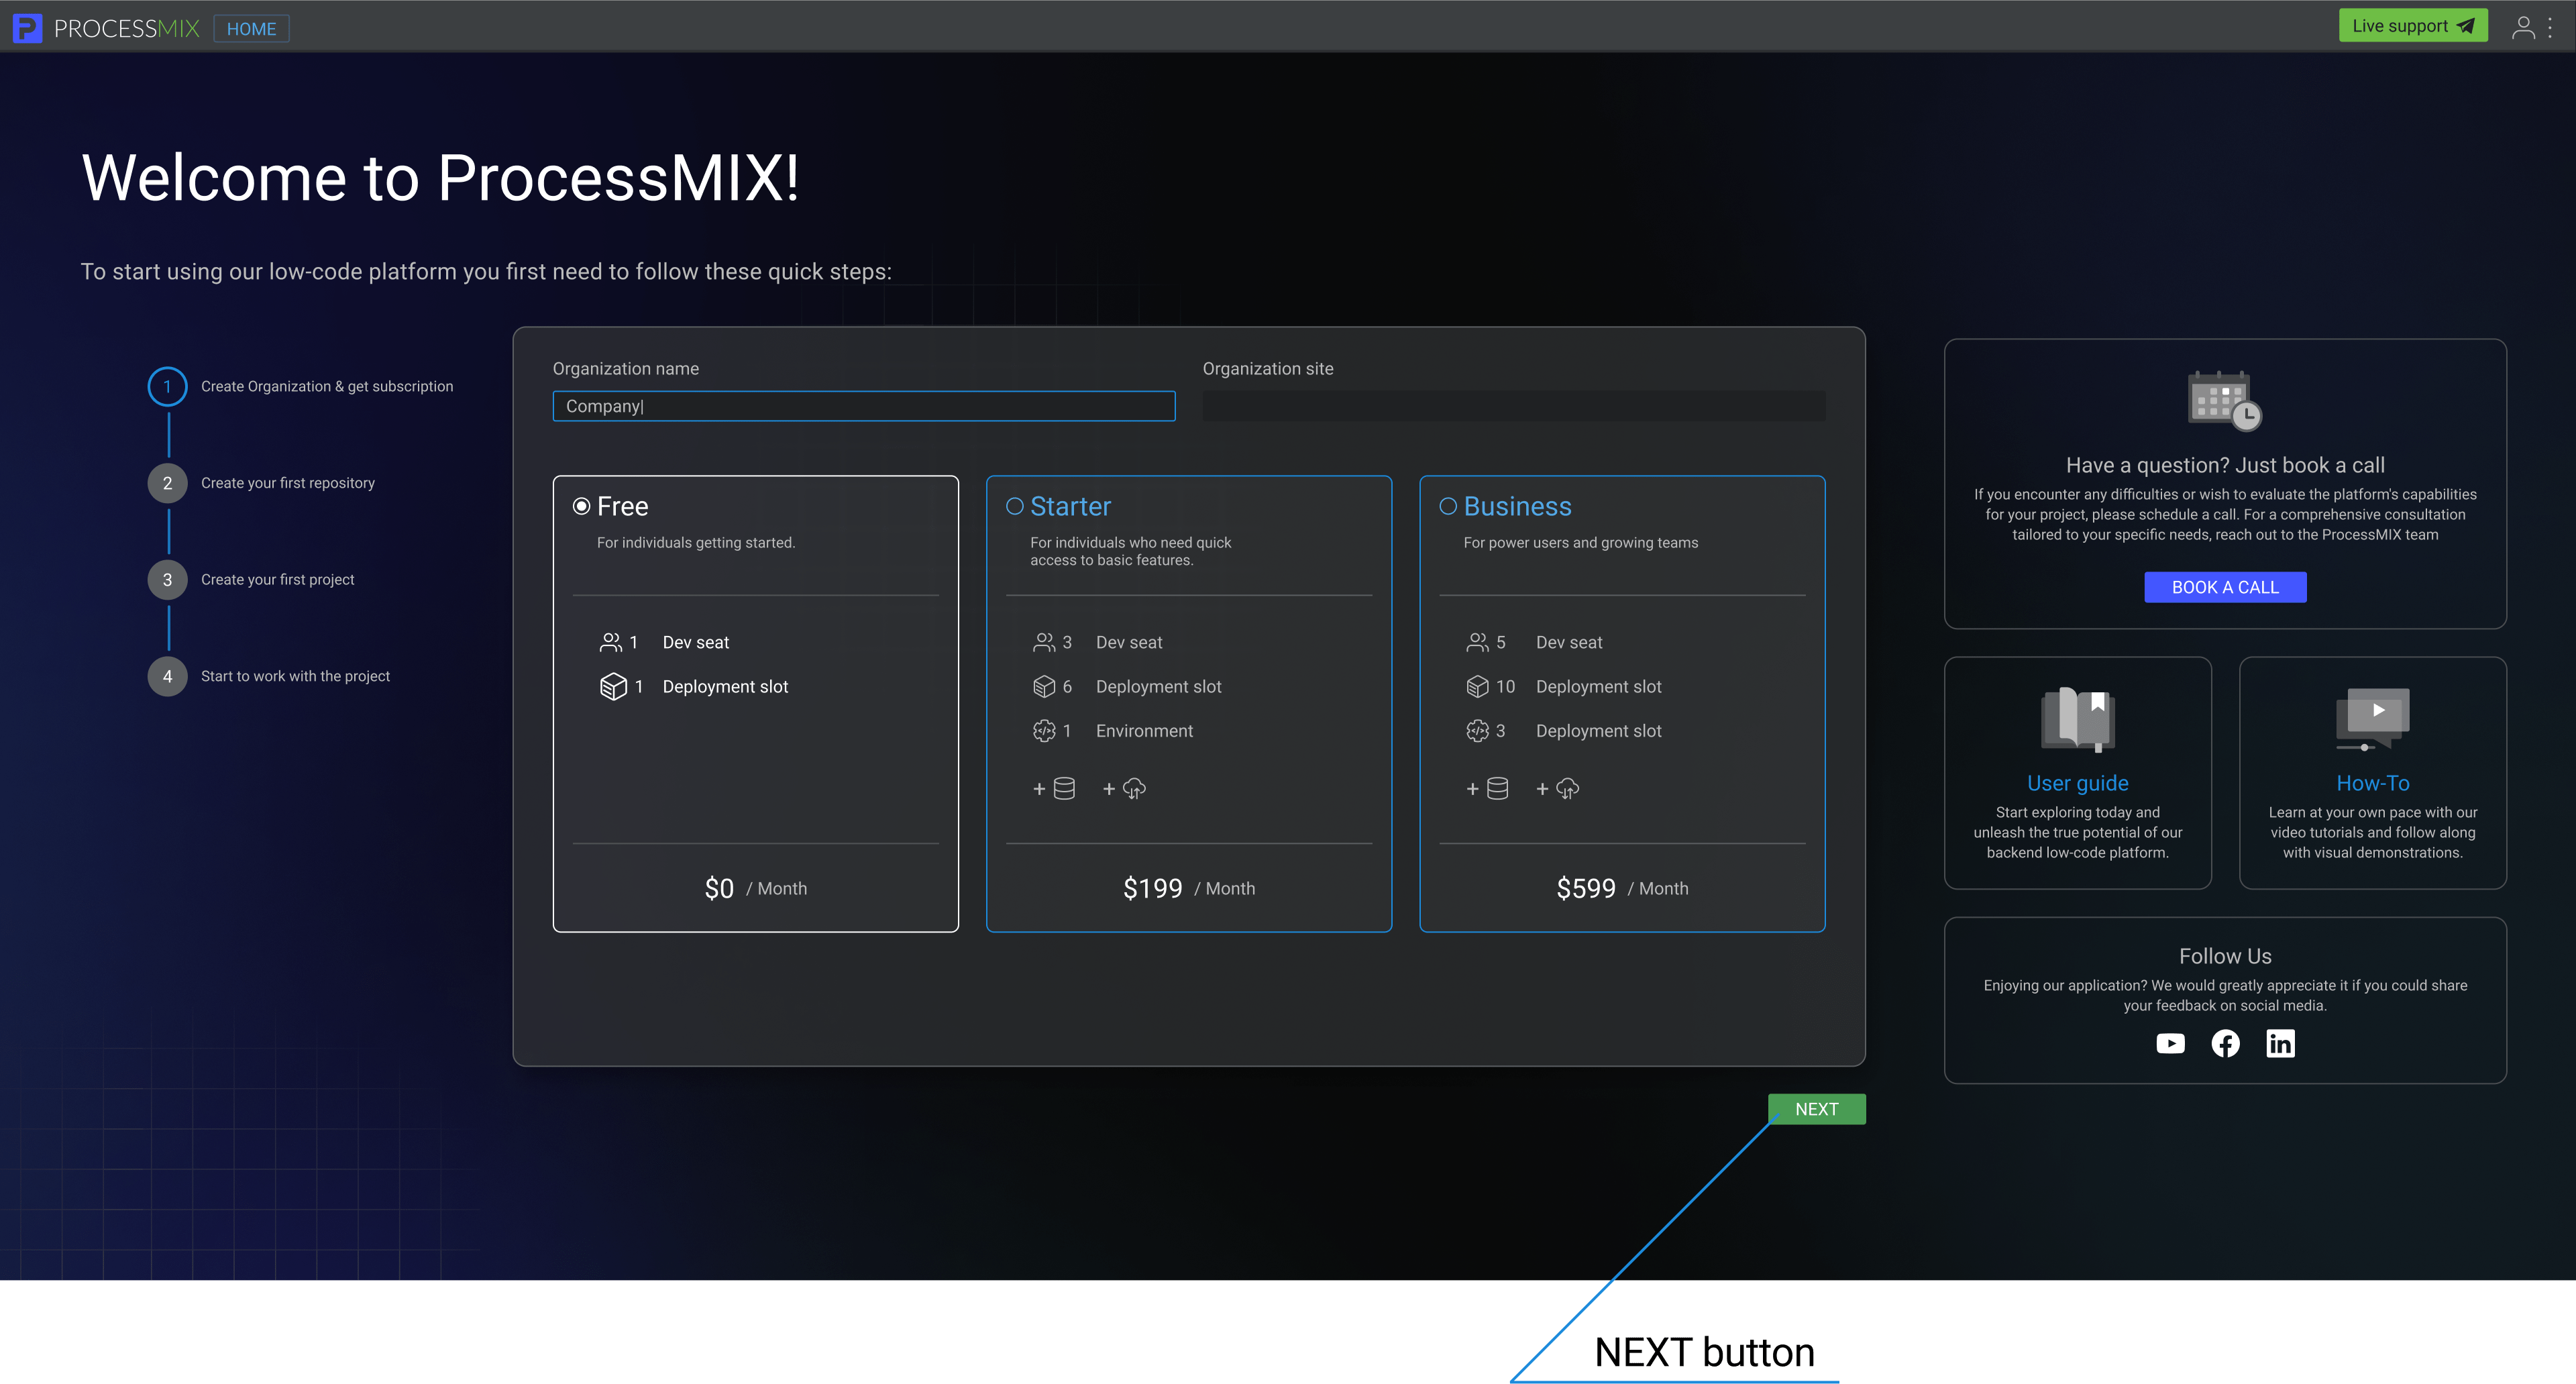
After signing-up successfully, the system redirects you to the Home page of the application. If you haven’t created an organization yet, the application will present a form to create an organization as the first step.
Step 1: Enter the name of the organization and its website (optional)
The organization’s name should be more than 3 characters and less than 64, and can include letters (Latin a-z, A-Z), numbers (0-9), $, and an underscore. It should begin with a letter or an underscore.
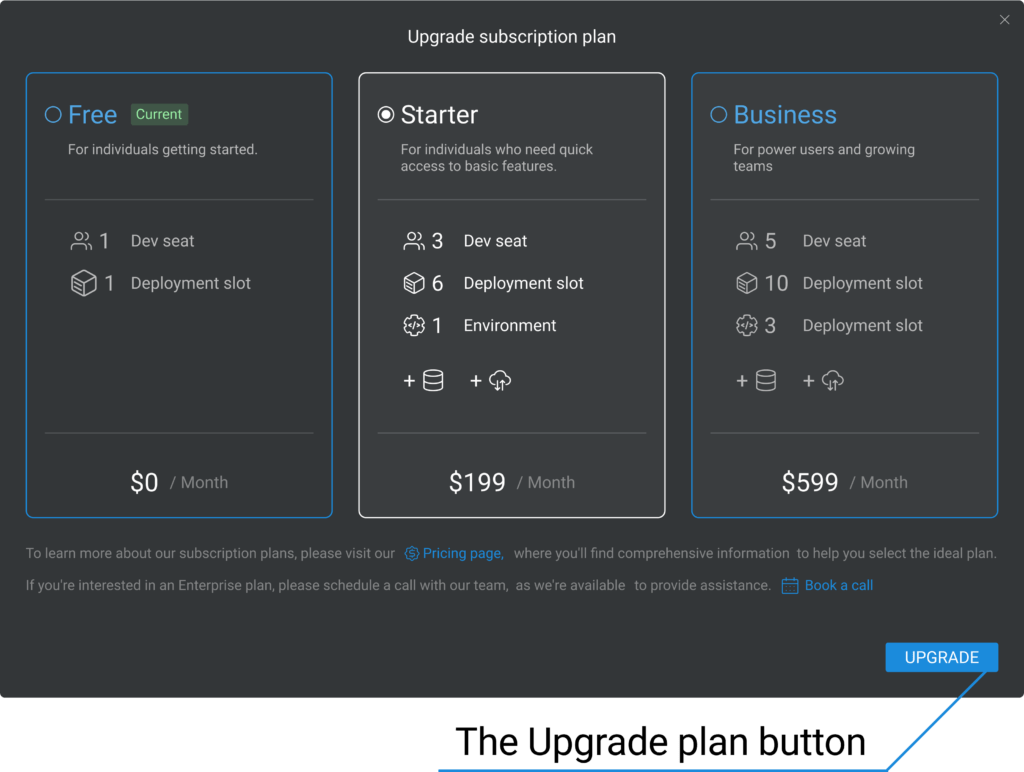
The default subscription type is ‘Starter.’ The following subscription plans are available for selection:
- Free
- Starter
- Business
To choose a free subscription with a limited number of resources, select the ‘Free’ plan and click the NEXT button.
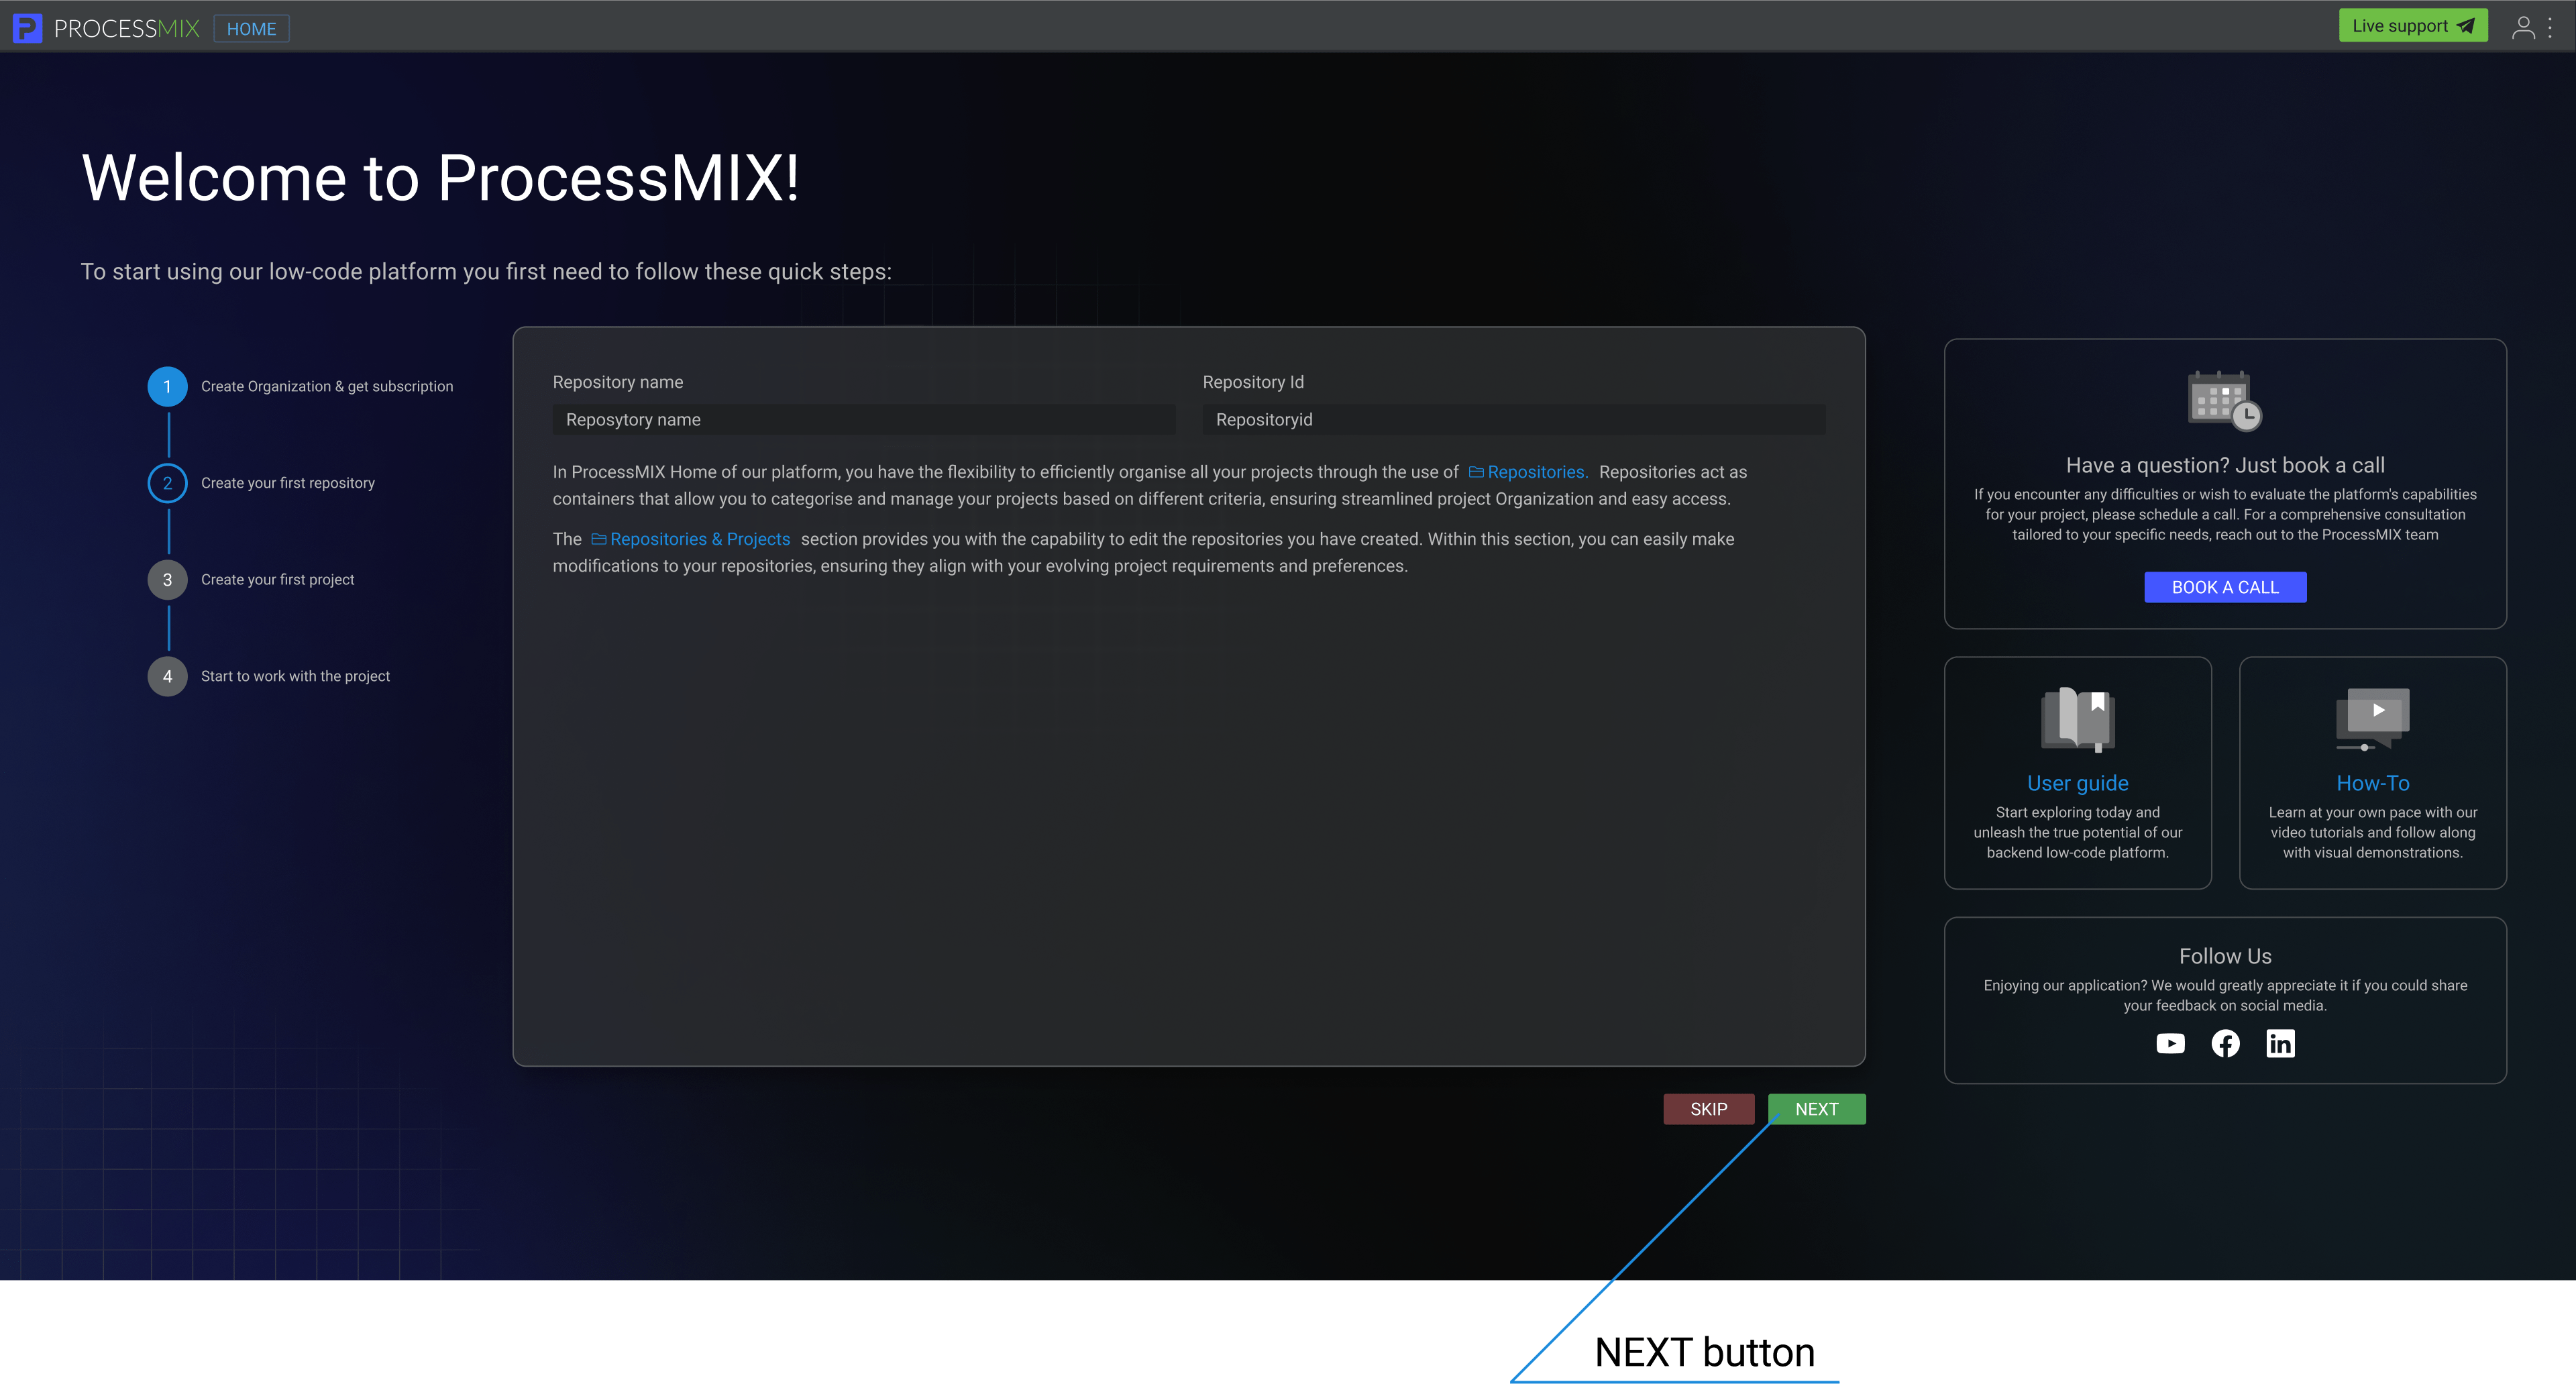
Step 2: Enter a Repository name and ID, then click the NEXT button. If you wish to skip this step, press SKIP. In this case, you can create a new repository later in the Home section of the Repositories and Projects page.
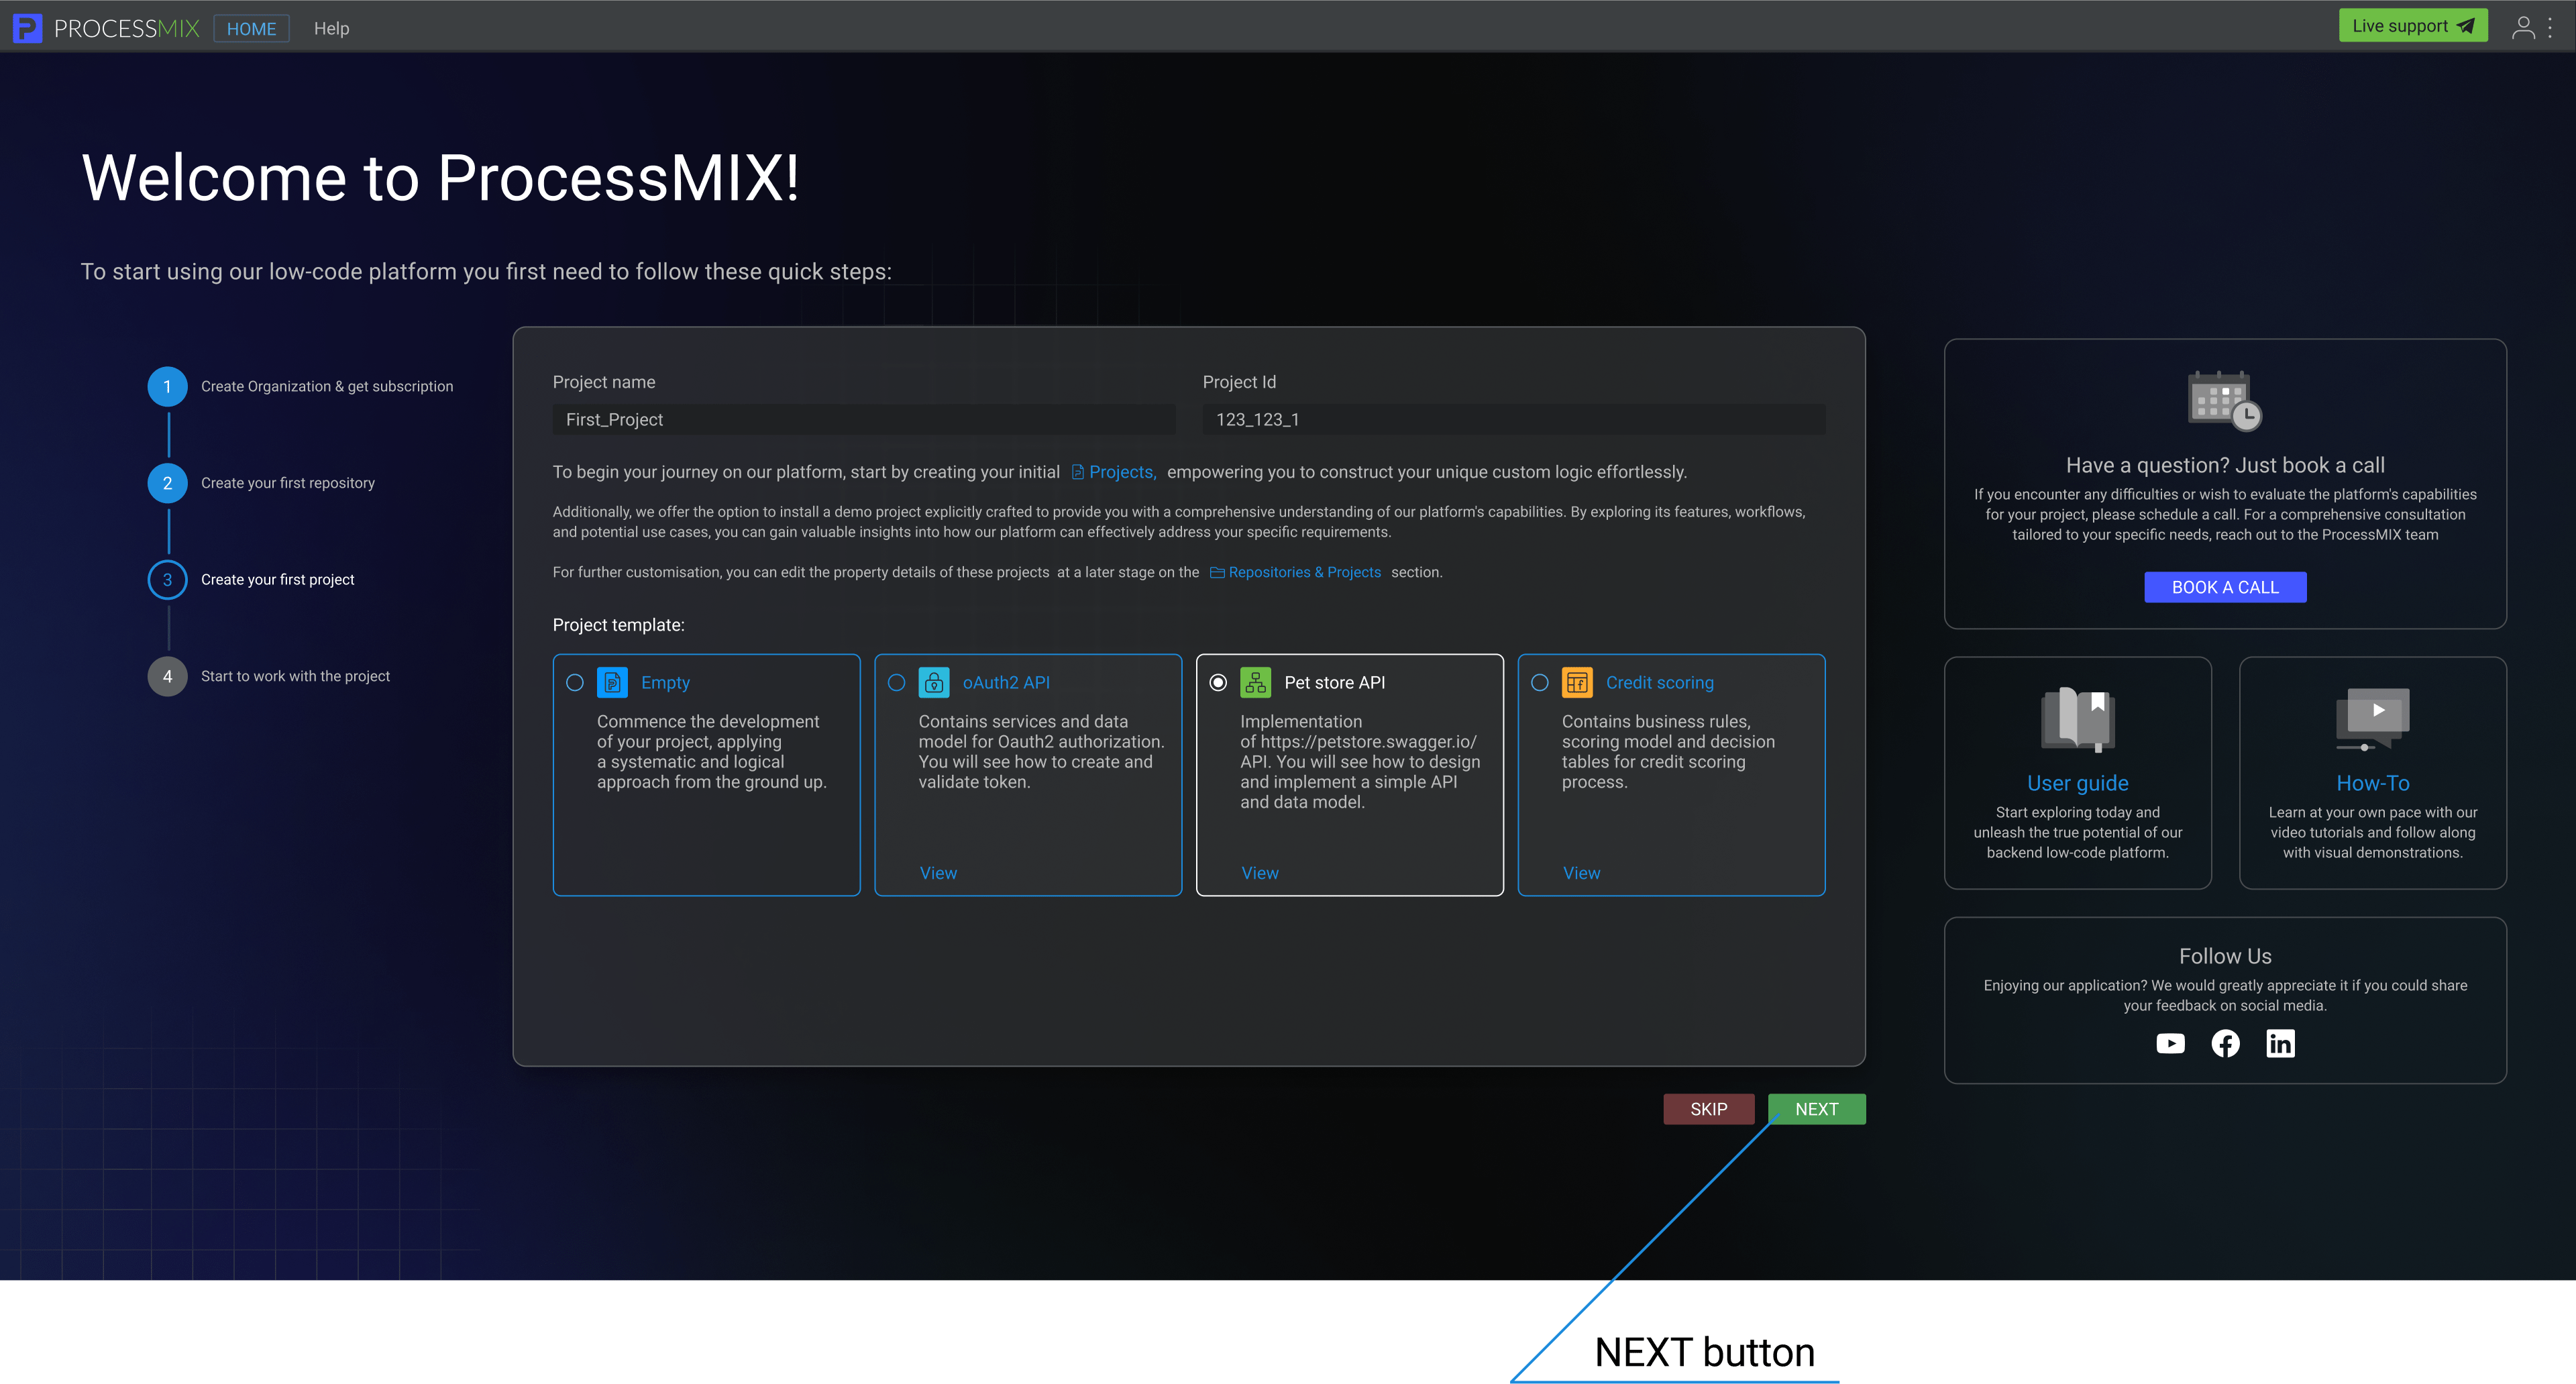
Step 3: Enter a Project name and ID, select a project template (if necessary), then click the NEXT button. If you wish to miss this step, press the SKIP. In this case, you can create a new project later in the Home section of the Repositories and Projects page.
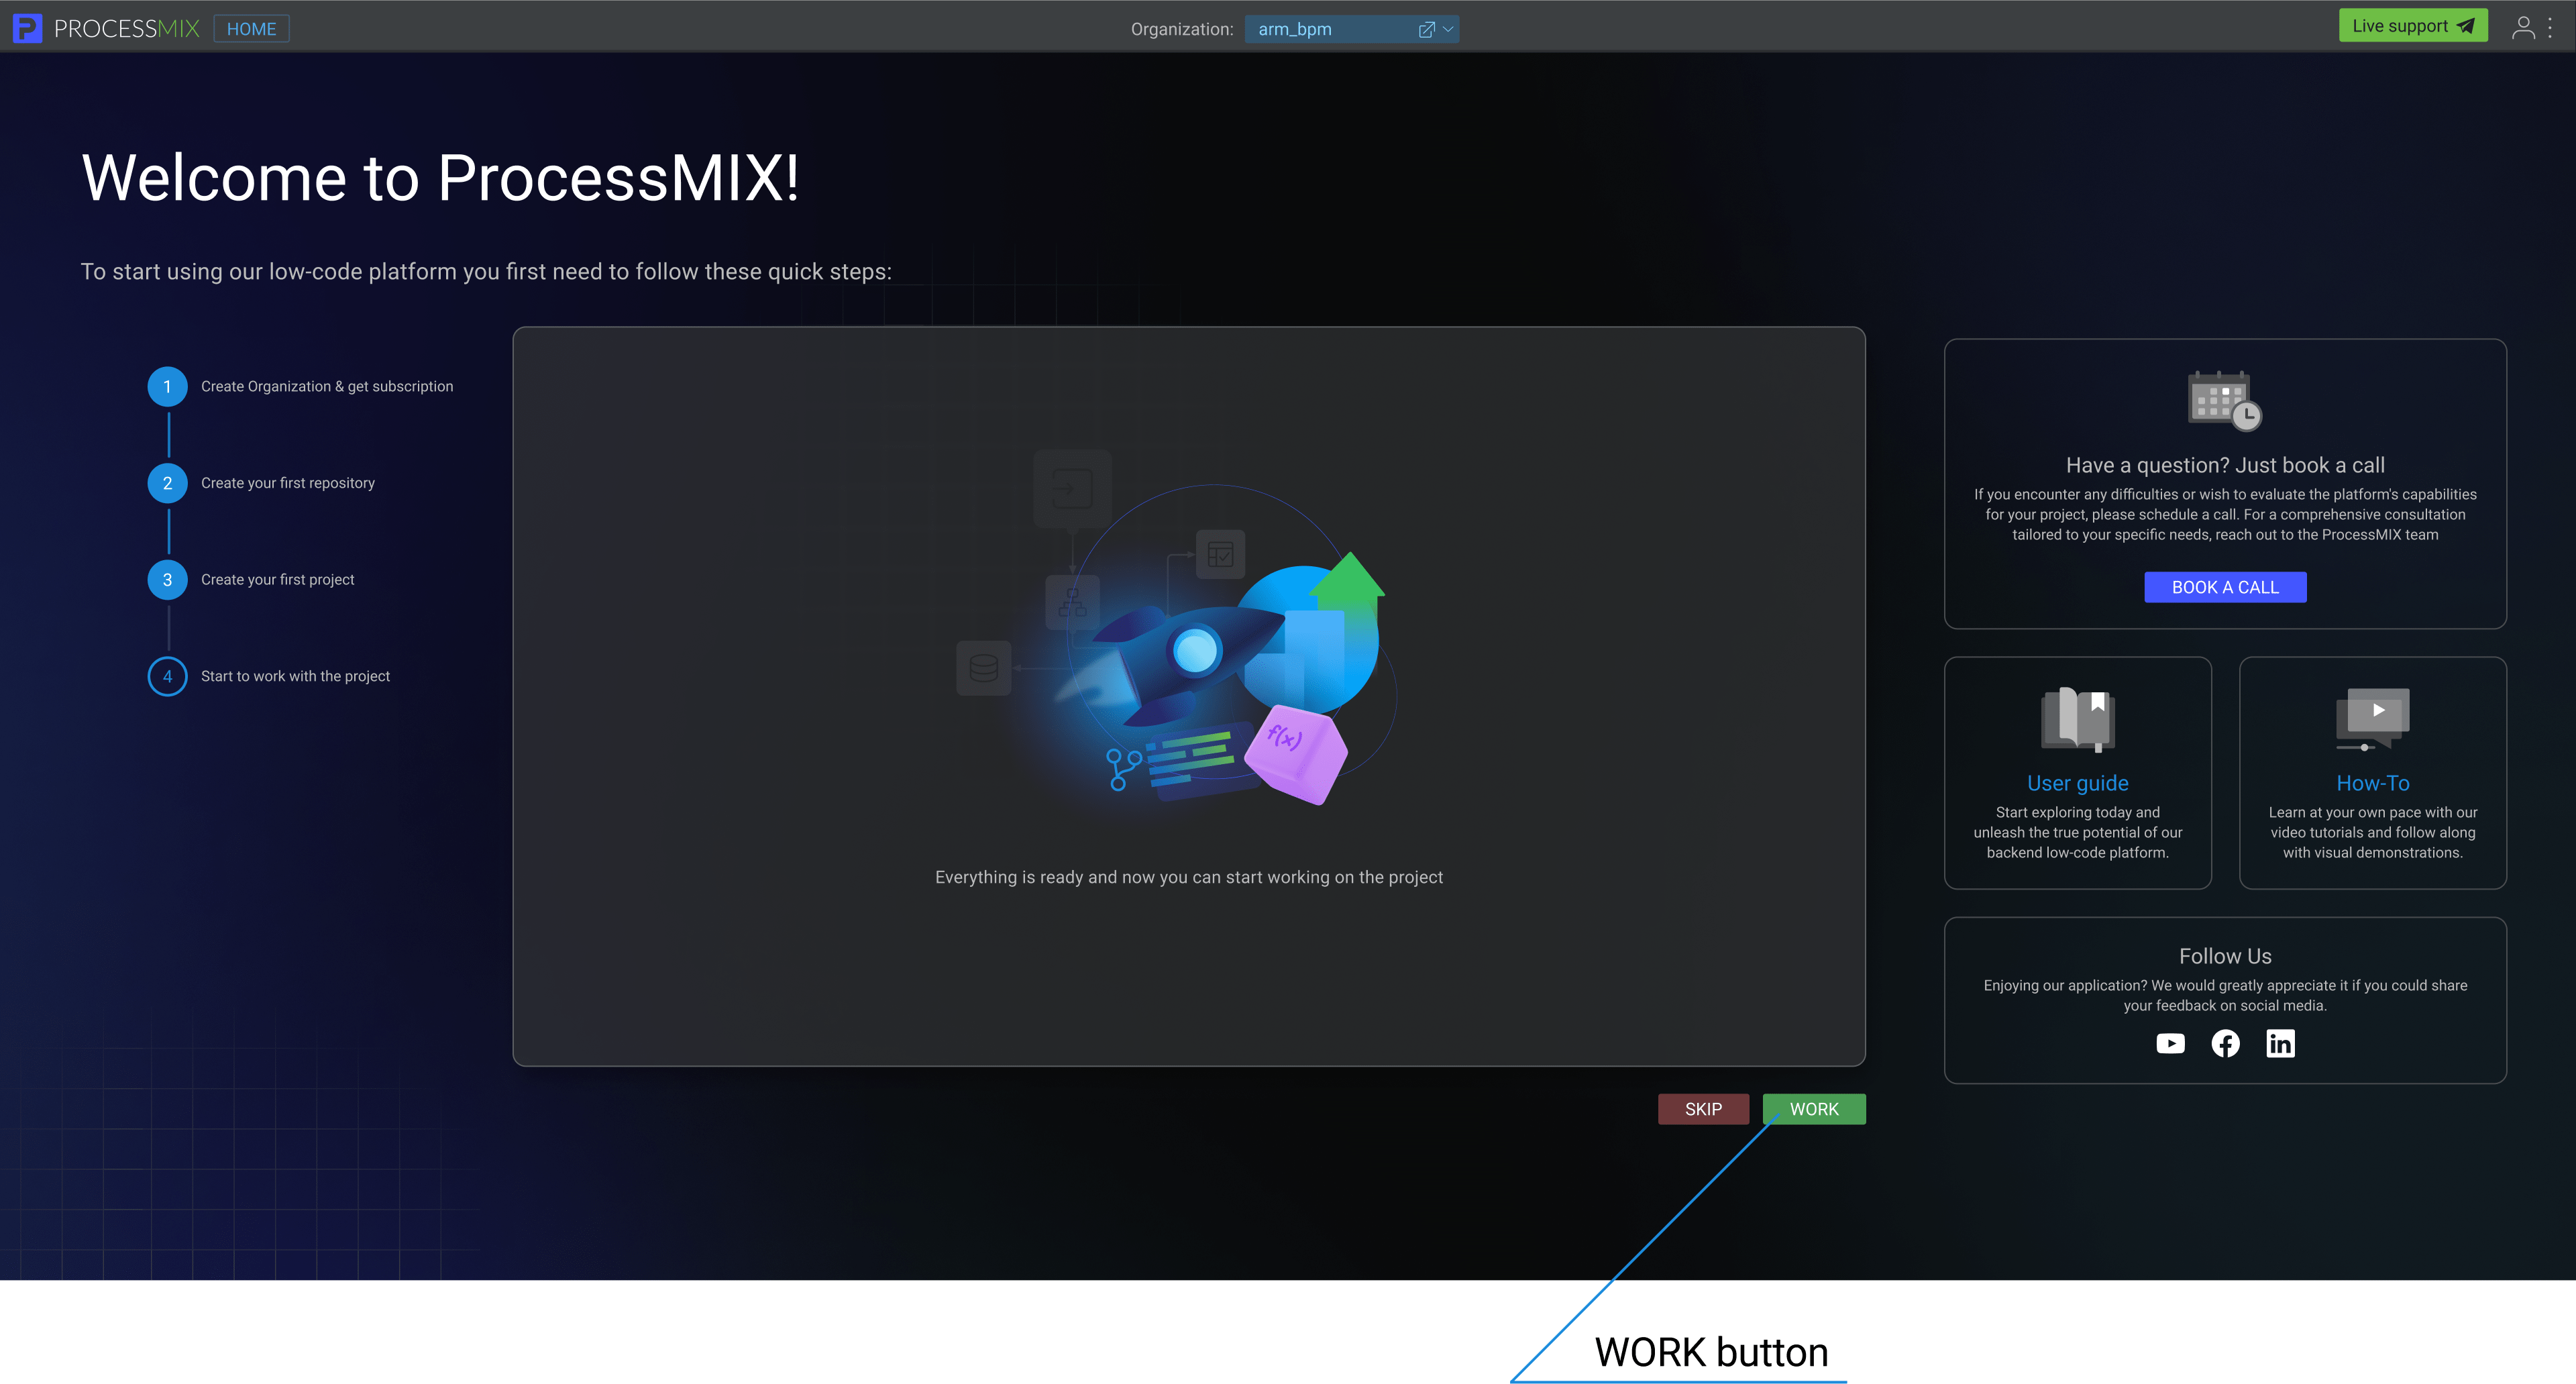
Step 4: To start working on the project in the IDE section, click the WORK button. If you click the SKIP button, you will be directed to the Home section.
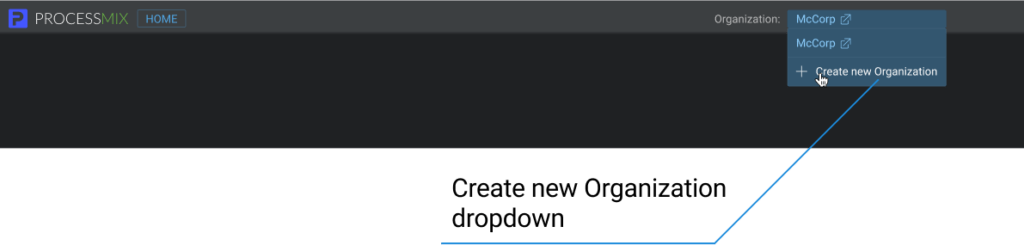
If you already have any organization created, to create a new one, сlick the name of the organization you are currently working with (right top panel), then click the + Create new organization.
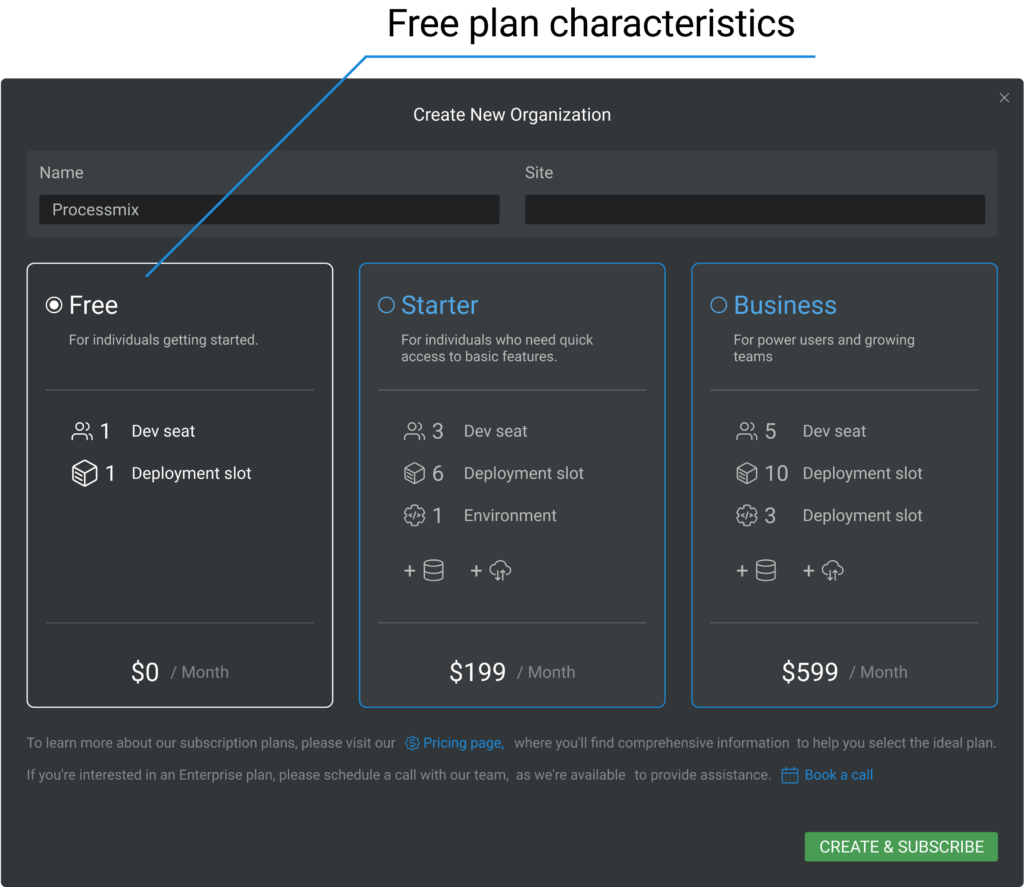
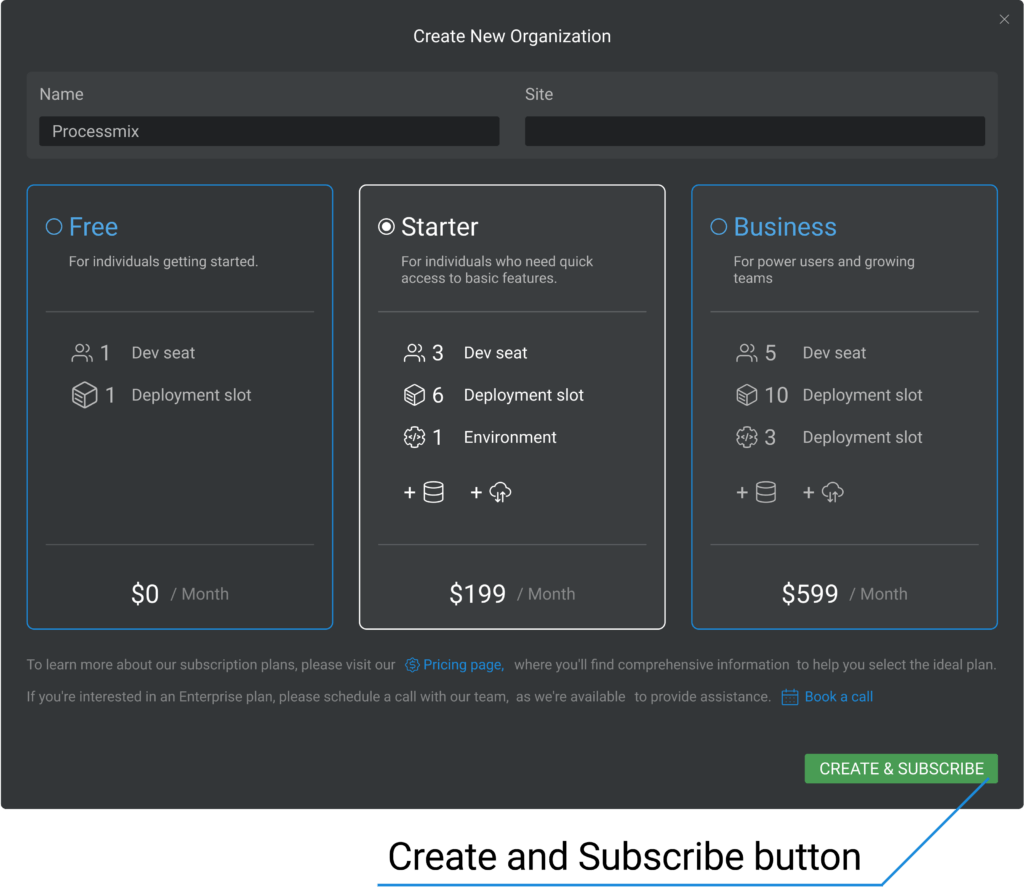
Then, enter the name of the organization, and its website (optional) and select the type of subscription in the presented pop-up.
The default subscription type is “Starter.”
The following subscription plans are available for selection:
- Free
- Starter
- Business
To choose a free subscription with a limited number of resources, select the “Free” plan and click the CREATE & SUBSCRIBE button.
Now the application is available to work with. Only one organization can be created for free.
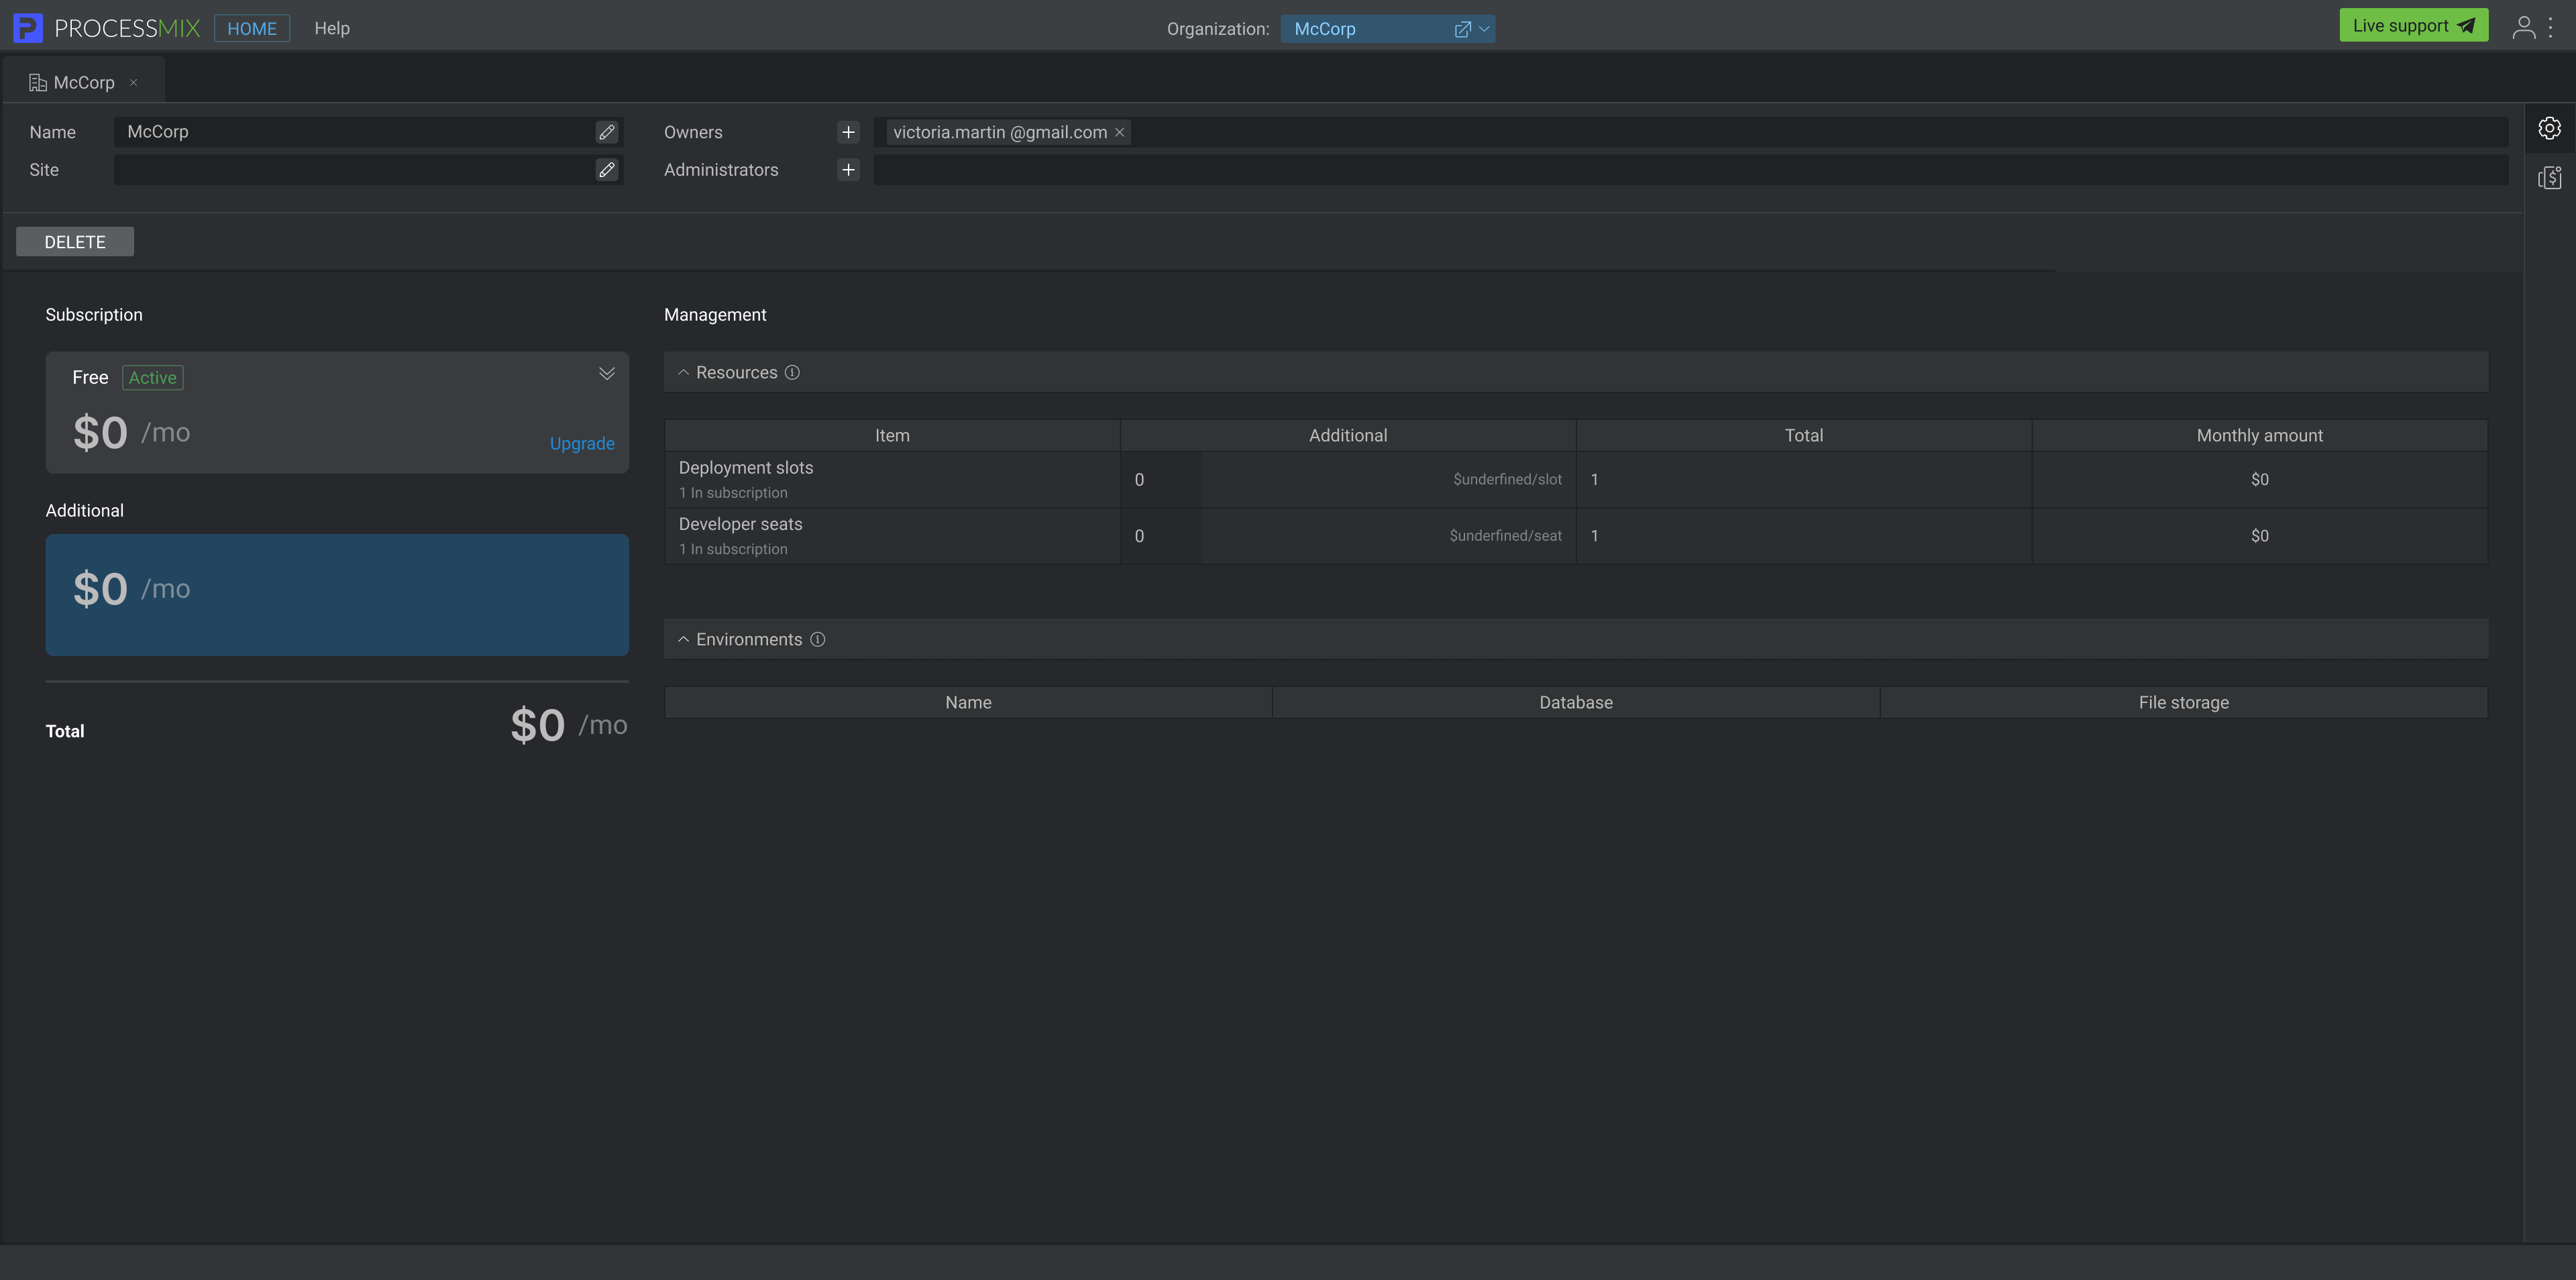
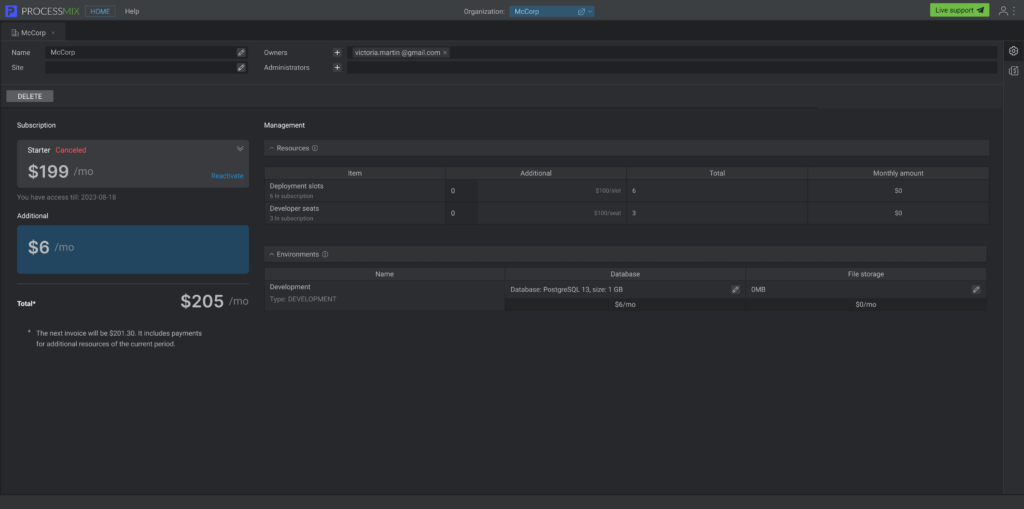
The following operations are available on the Organization page:
- Change the name of the created organization or its website.
- Set up administrators and owners.
- Delete organization.
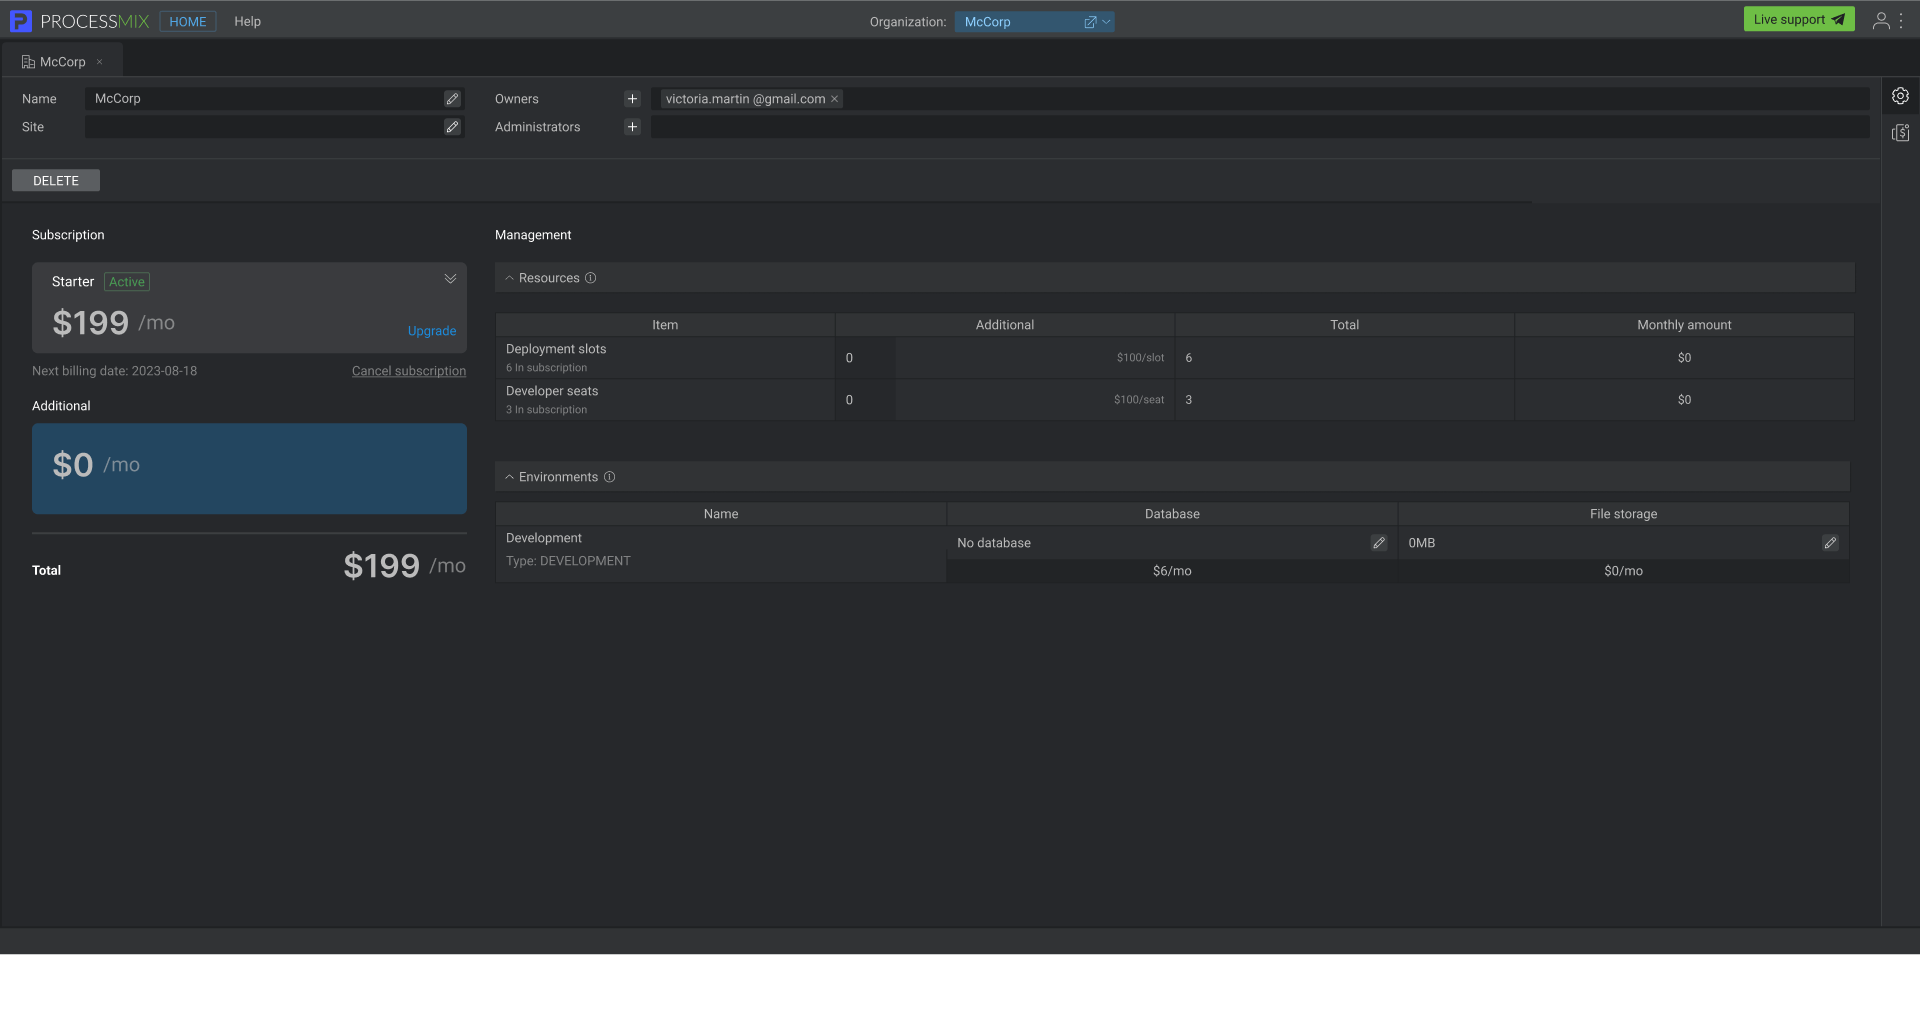
- Adjust the subscription (view, upgrade, cancel).
- View and manage (add extra resources or delete them) current resources.
For a paid subscription select the tariff “Starter” or “Business”. Then click the CREATE & SUBSCRIBE button.
Now you are redirected to the payment page. Enter your banking card details and other information needed.

If the payment has been successful, you are redirected to the ProcessMIX Home application. Now the subscription is activated.
How to change the name of the organization?
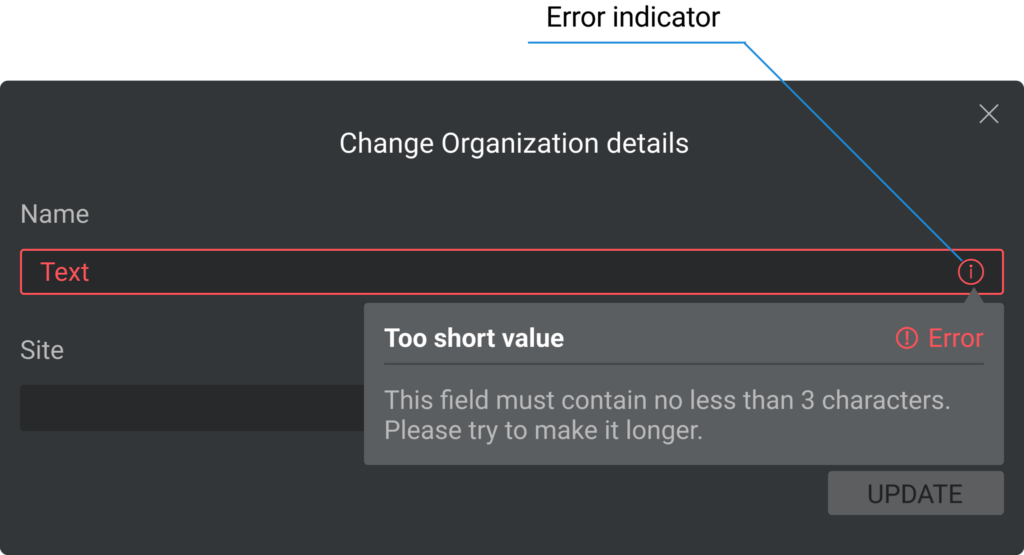
To change the name of the organization or its site, click  in the appropriate input field. Enter a new organization name and click UPDATE.
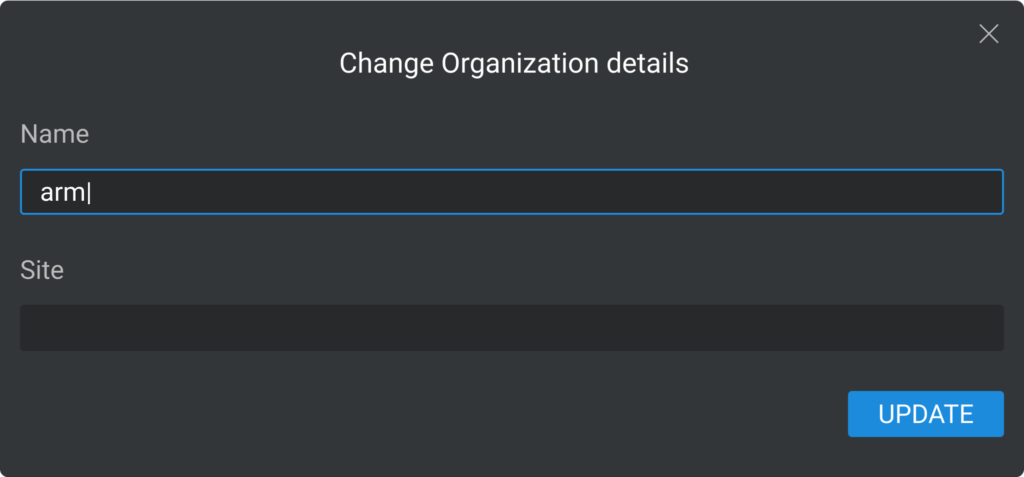
If the name or site is entered incorrectly, the input field is highlighted red, and an error indicator is displayed.
How to add an owner to the organization?
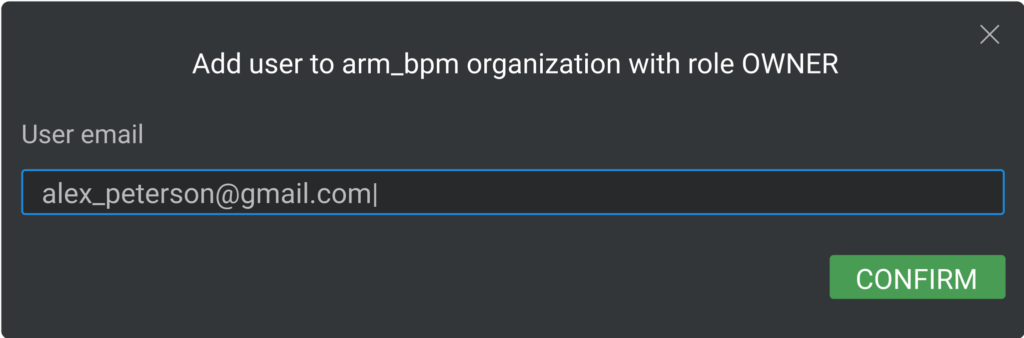
To add a new owner or administrator to the organization click the New owner button  next to the corresponding field. Enter the new owner’s email in the open window and click the CONFIRM button.
First, you need to add a user to the Organization Team. Then, you can assign them roles such as Owner, Administrator, or Project User (editor, viewer).
The user must be registered on the platform.
If the user’s email is entered incorrectly, the input field is highlighted red, and an error indicator is displayed.
How to delete the organization?
To delete an organization, click the DELETE button, then confirm the action by clicking the DELETE button in the open window.
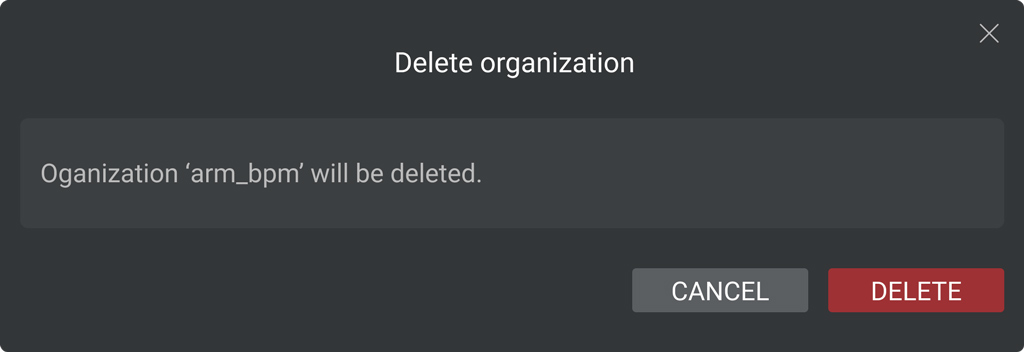
After deleting an organization, all its resources are also deleted, including created project deployments and database, if they have been previously added as an additional resource.
If you have added a database, we recommend dumping it by using a third-party utility.
How to cancel the organization’s subscription?
To cancel the subscription, click Cancel subscription on the organization page. The subscription status will then change to CANCELED, and it will become INACTIVE after the paid period ends.
The platform can be used without any restrictions until the end of the paid period. You can restore the subscription until the end of the paid period. To restore the subscription, click the Reactivate button. The next subscription payment will be made according to the previous payment schedule.
How to upgrade the organization’s subscription?
To upgrade your subscription, click the Upgrade button near the current subscription information, select a plan you need, then click the UPGRADE button.
Now, you are redirected to the payment page. Enter your banking card details and other information needed.
How to add or remove your organization’s additional resources?
Additional resources you can add or remove:
- database
- file storage (for the enterprise plan only)
You can purchase or reduce resources if:
- your organization has a paid subscription
- your current subscription is active
- you have the role of an owner
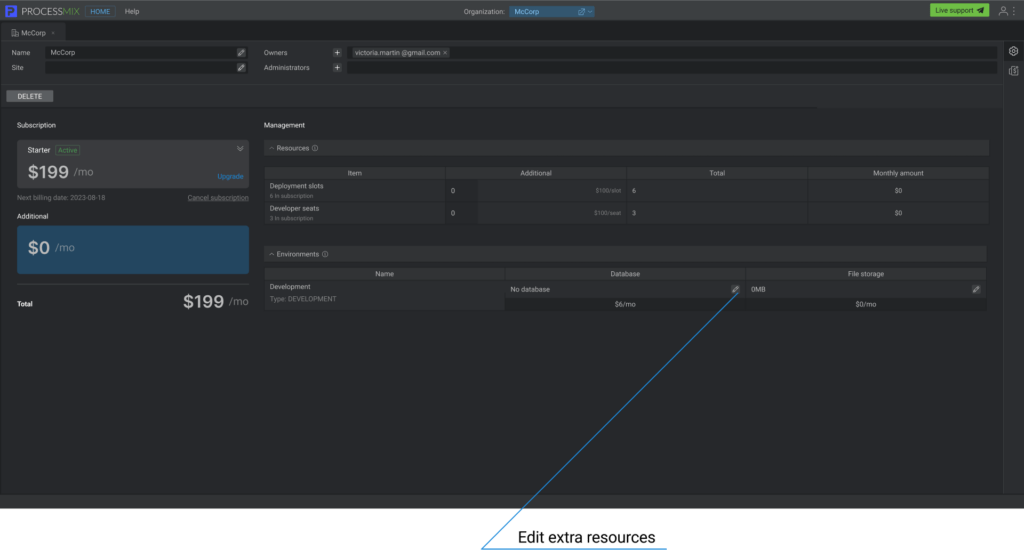
How to purchase or remove a Database?
If the users wish to add extra resources, a database in particular, they need to go to the Environments section on the Organization page and then click the Edit button in the Database section.
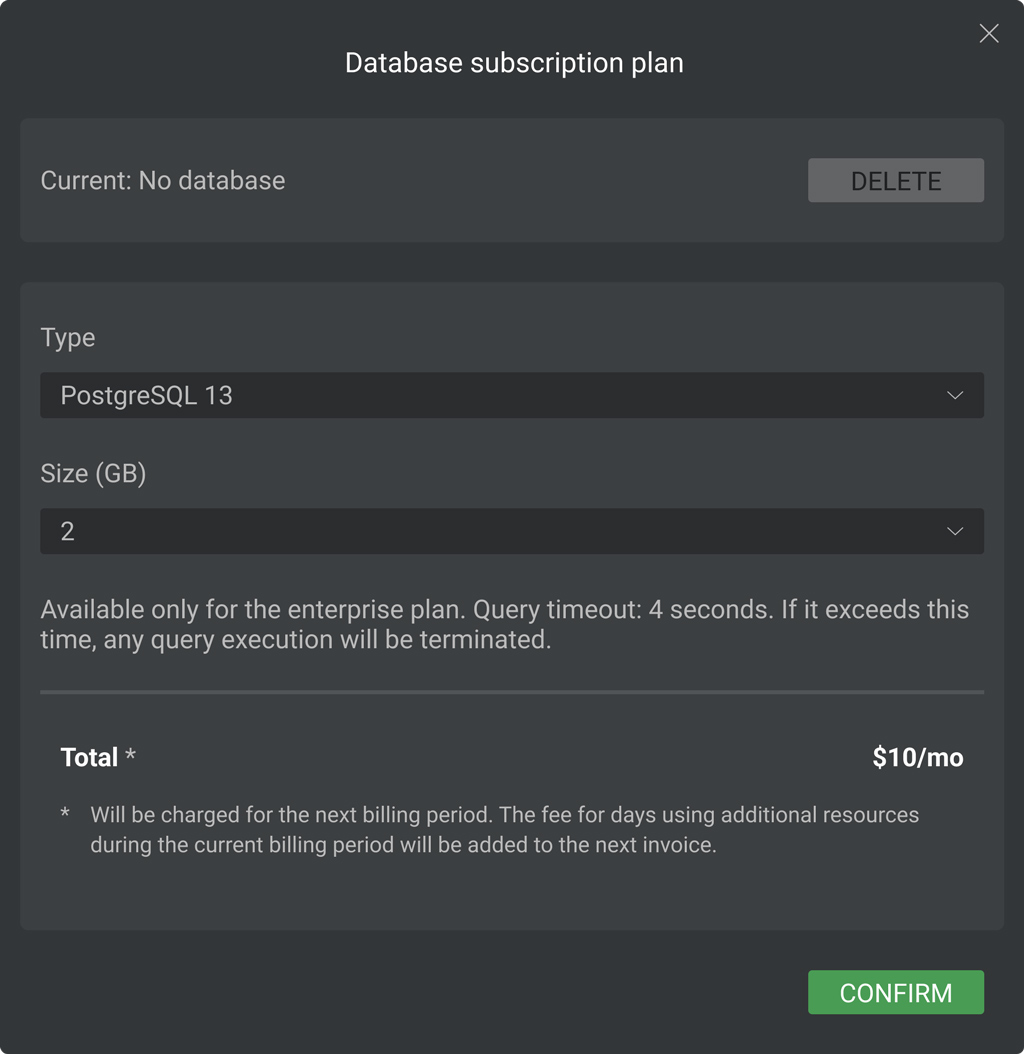
Select the type of database in the pop-up open (PostgreSQL 13 is only available). Enter the desired amount of Database in the SIZE(GB) input field. Then click the CONFIRM button.
How to purchase file storage?
Available for the “Enterprise” plan only.
After confirmation, all purchased resources are provided immediately. Payment for new resources will be charged in the next billing period. The charge for additional resources used within the current billing period will be added to the next invoice.
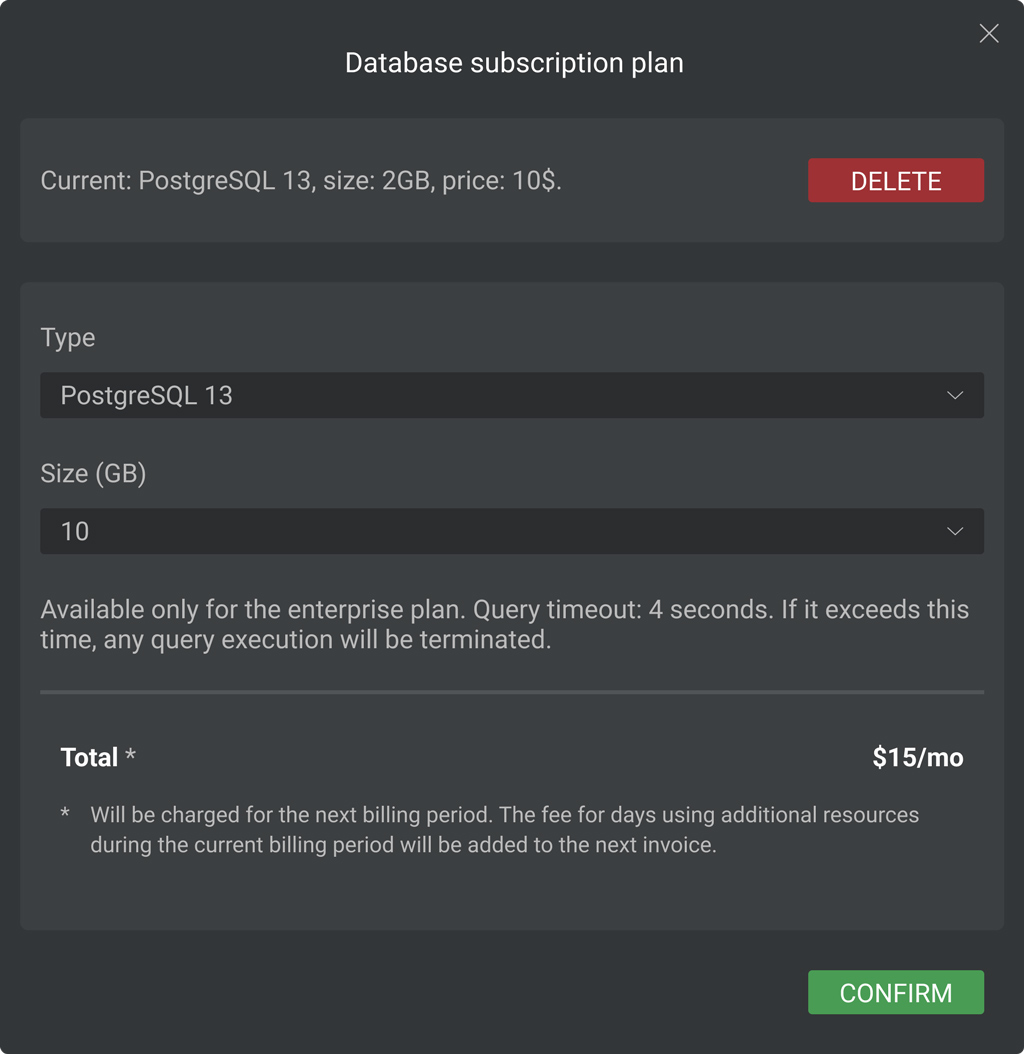
How to delete additional Database?
To delete additional Database, go to the Environments section on the Organization page and click the Edit button in the appropriate place.
Then click the DELETE button.
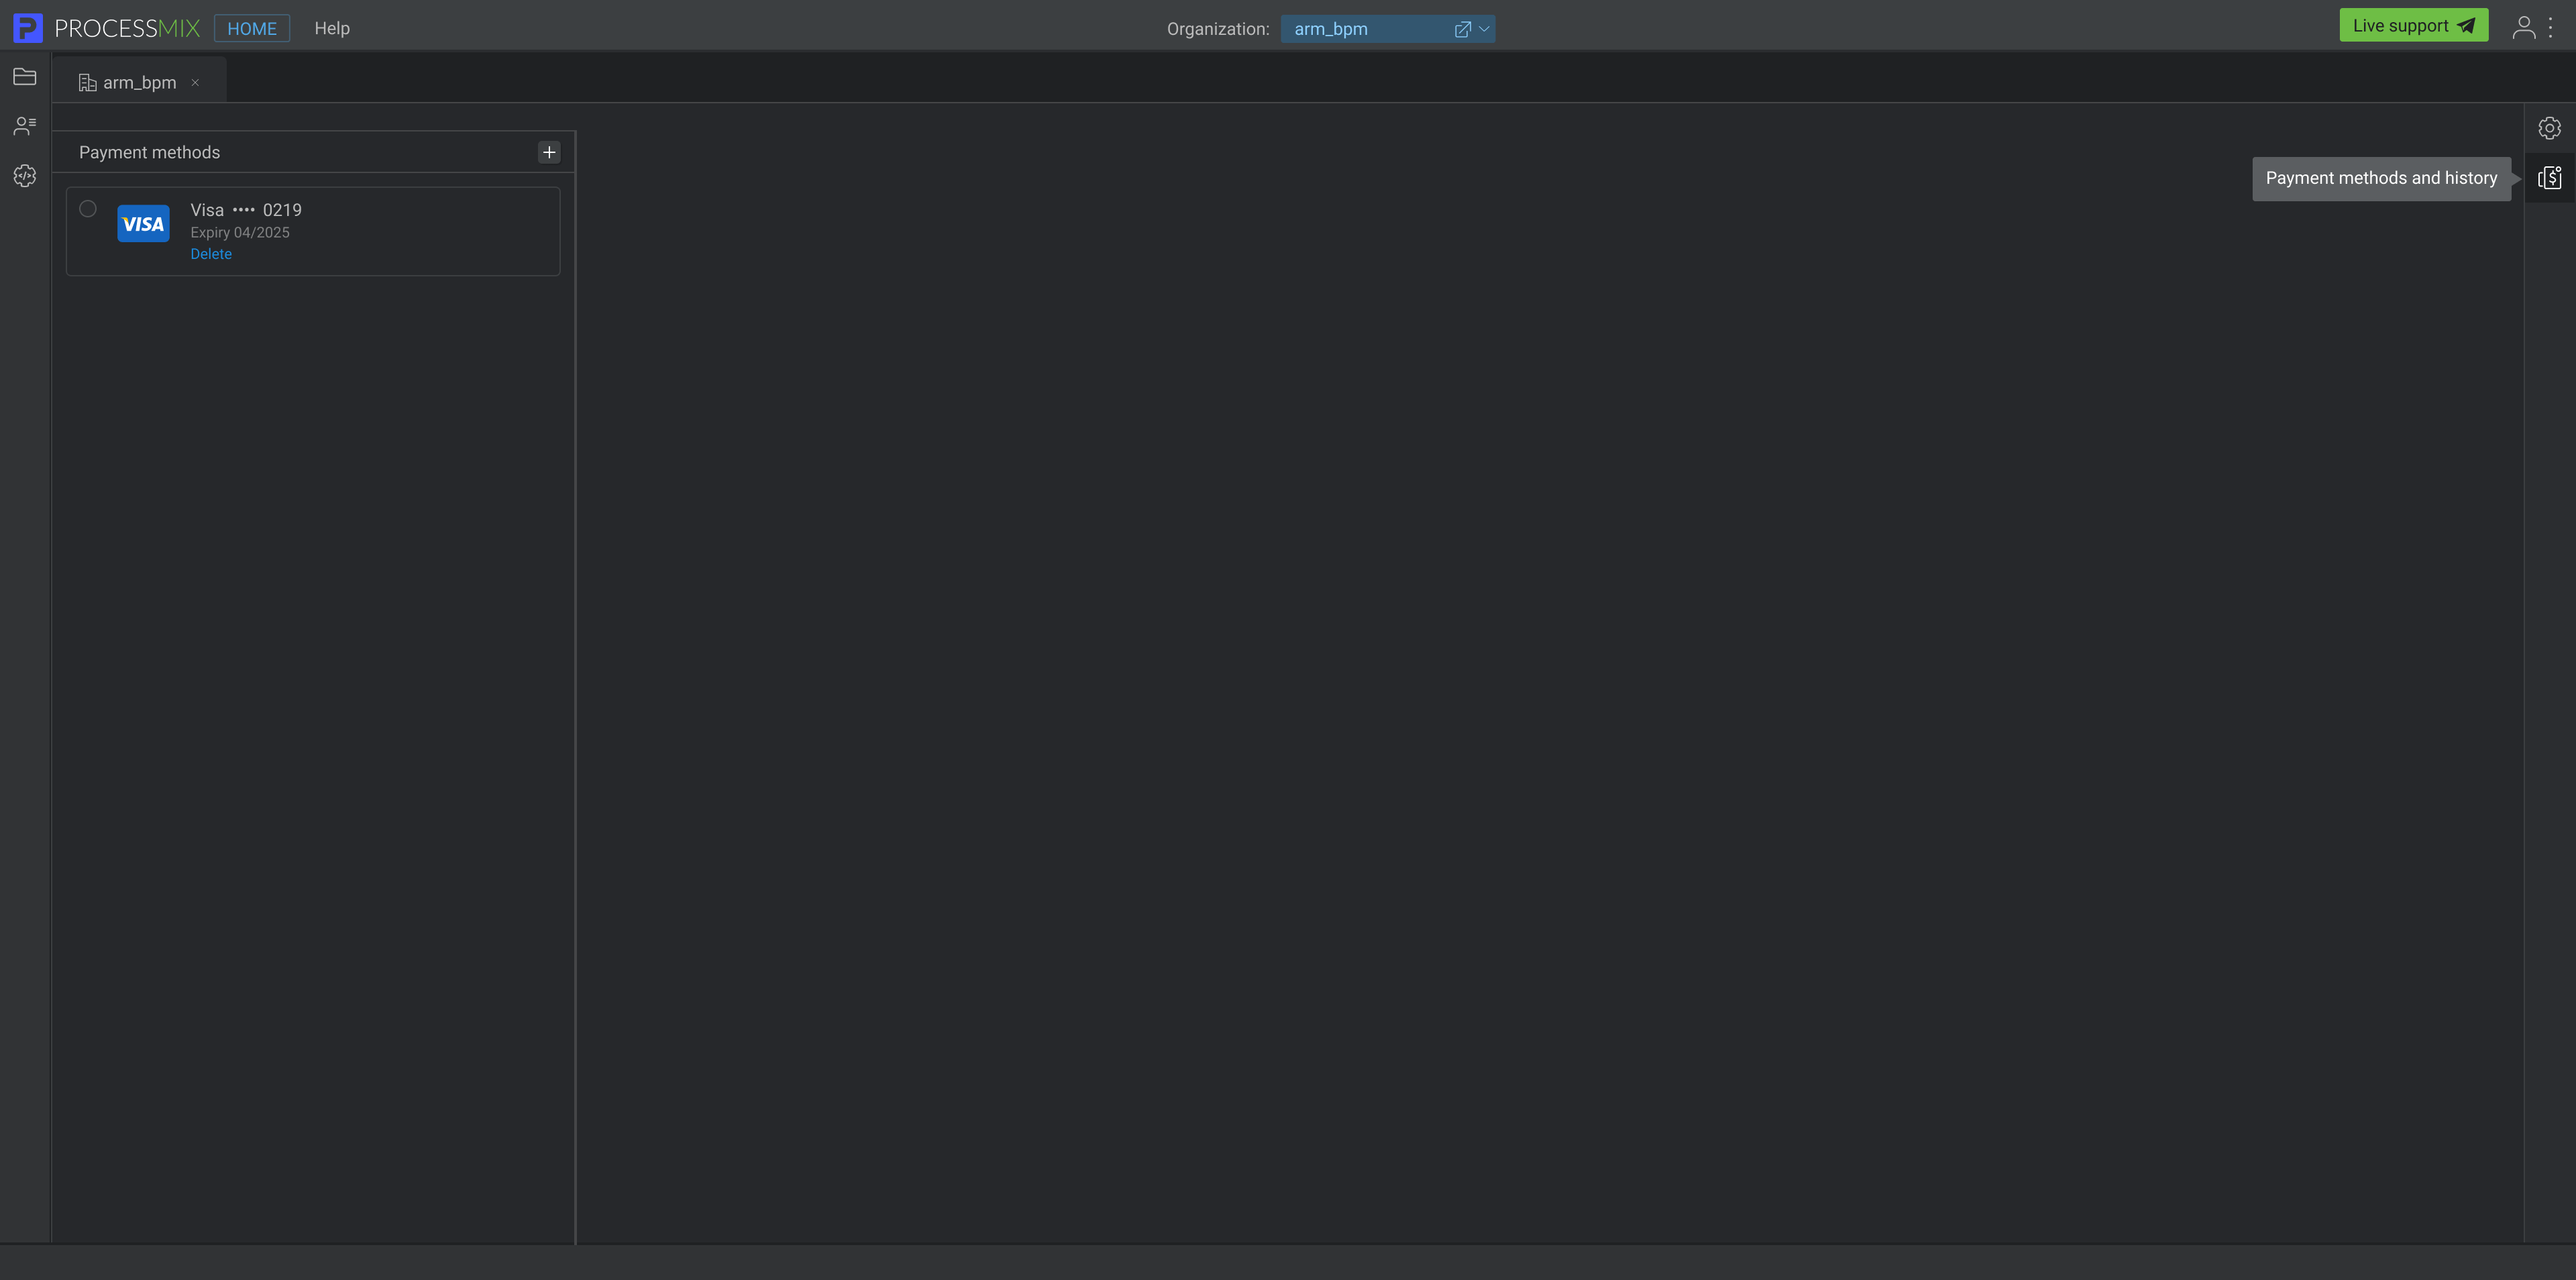
How to change the payment method?
To change the payment method, click the Payment method and history tab in the right vertical panel on the Organization page.
To add a new payment method, click the Add payment methods button . Now you are redirected to the payment page. Insert your banking card information needed.
How to delete the payment method?
To delete the payment method, click the DELETE inside the desired method.

You cannot delete a payment method currently used by the system. To delete the method, add a new one and change the default payment method to the newly added one.