- Platform
-
-
- Menu Item
 Visual Development
Use our intuitive, visual drag-and-drop interface to build powerful business apps for automation, decision-making and customer service.
- Data Modeling
Model data structures of any complexity. Organize them into fields of various types, nested structures, arrays, and maps. Serialize as JSON, XML or other/custom markup.
- Integration
Utilize built-in connector library to quickly connect ProcessMIX applications to databases, REST/SOAP web services, Amazon S3, Kafka messaging or blockchain.
- Decision Tables
Author complex business logic and manage large number of rules easily in a tabular format.
- Scorecards
Apply predictive analytics and lower risk by incorporating scoring models into your decision strategies with the help of our scorecard model editor.
- PMML
Import and execute Predictive Modeling Markup Language (PMML) models to add the power of data mining and AI to your solutions.
- Version Control
Manage complex development projects more effectively with ProcessMIX version control system, complete with code change monitoring, version history, branching and dev team collaboration.
- Debugging and Testing
Build more robust solutions and troubleshoot easily with our testing and debugging tools, including step-by-step execution, performance monitoring, unit tests and automatic log collection.
- Deployment and Execution
Use ProcessMIX to deploy REST/SOAP API or scheduled jobs to the cloud with a single click. Leverage built-in Docker packaging, Kubernetes service generation and AWS cloud support. Alternatively, export projects as JAR/WAR packages or Java source code for on-premise deployment or to fit your own software deployment strategy.
- Menu Item
-
-
- Solutions
 Visual Development
 Assignment of risk level and customer category within KYC processes during customer onboarding
 Cross-sell offer calculation for a 12MM strong client portfolio
Deployments
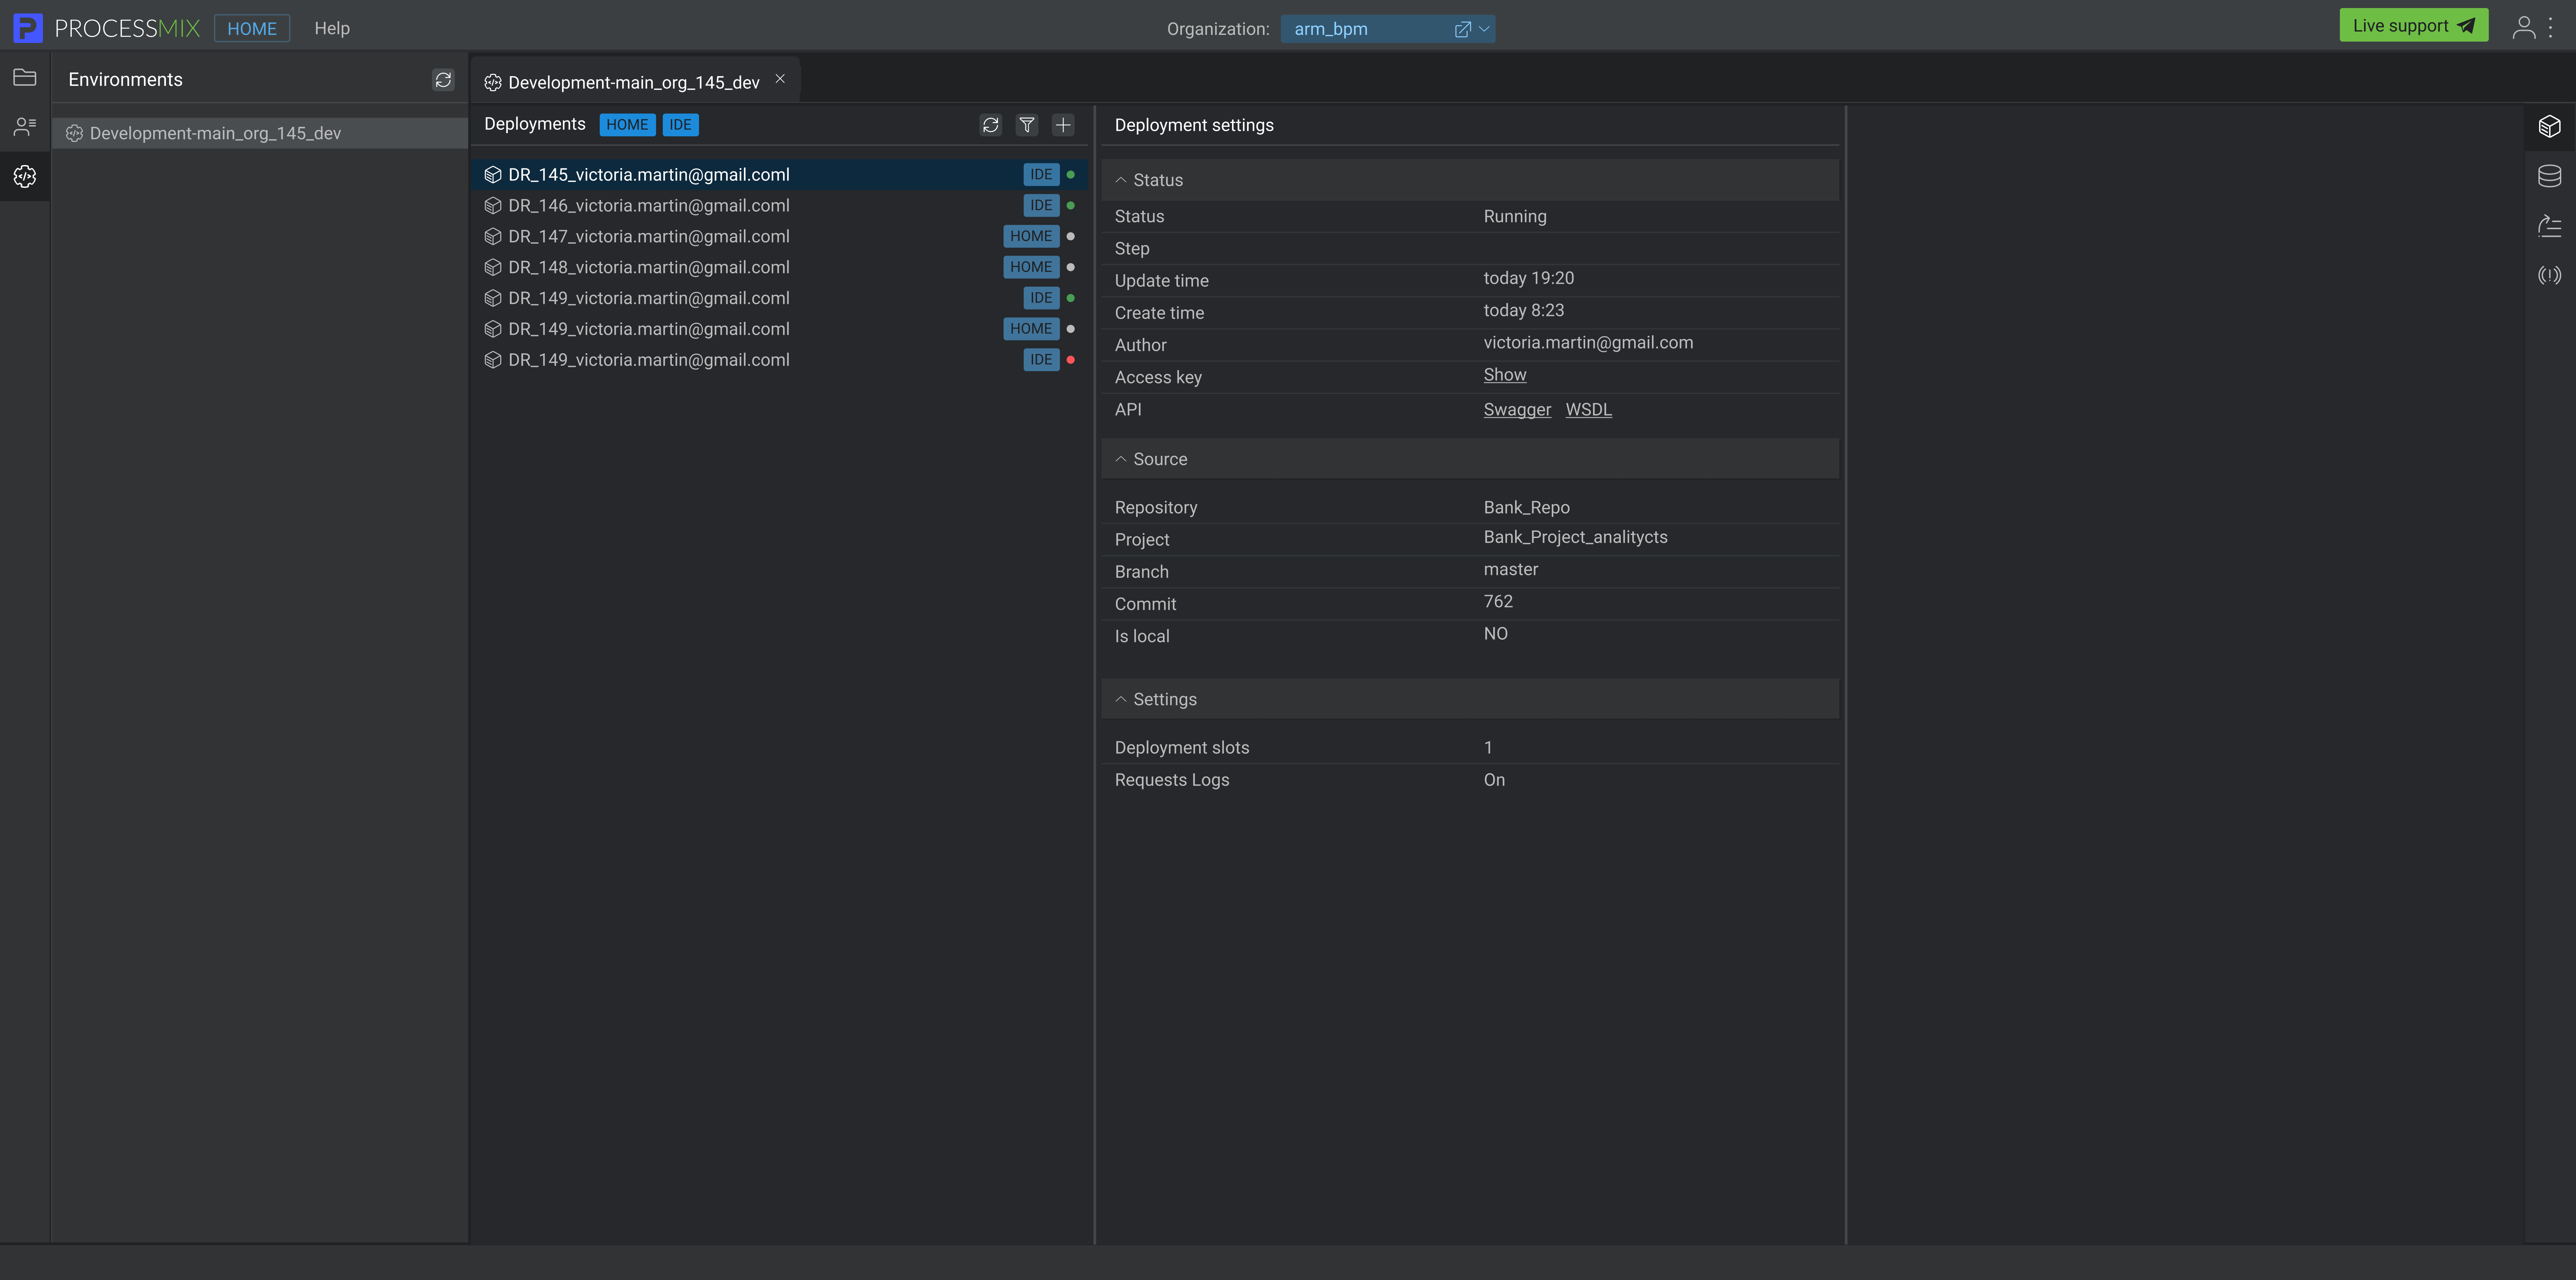
The Deployment section is available for each environment. It contains a list of all deployed projects, including default deployments from the IDE for each user working on the project and deployments that were created from the HOME application, along with their respective statuses and labels. Within this section, you can view and manage your deployments, deploy projects to any environment for future use of Swagger or WSDL files, and access keys.
The Deployment section is only available to owners and administrators.
The Deployment section contains deployments from both HOME and IDE, along with their respective settings.
How to work with deployments?
To deploy a project, click on the Add New Deployment button  in the Deployments section.
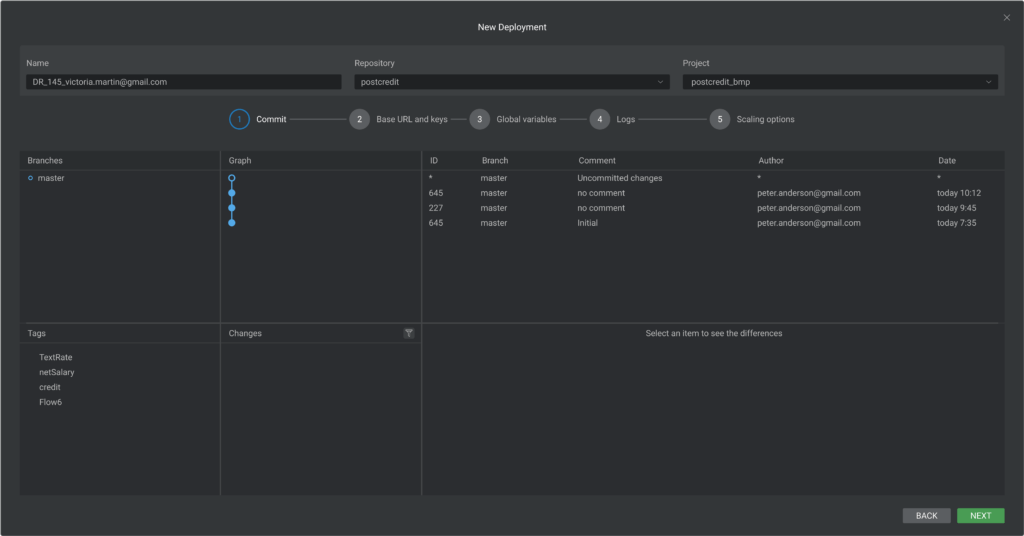
After that, a New Deployment pop-up window will appear in which the name of the new deployment will be automatically assigned. The name is editable. If you have not created any projects or repositories, STEP 1 Commit will be unavailable, and the repository and project fields will remain empty.
You can create a deployment only if you have previously created a repository and a project with commits that include at least one flow and do not contain errors.
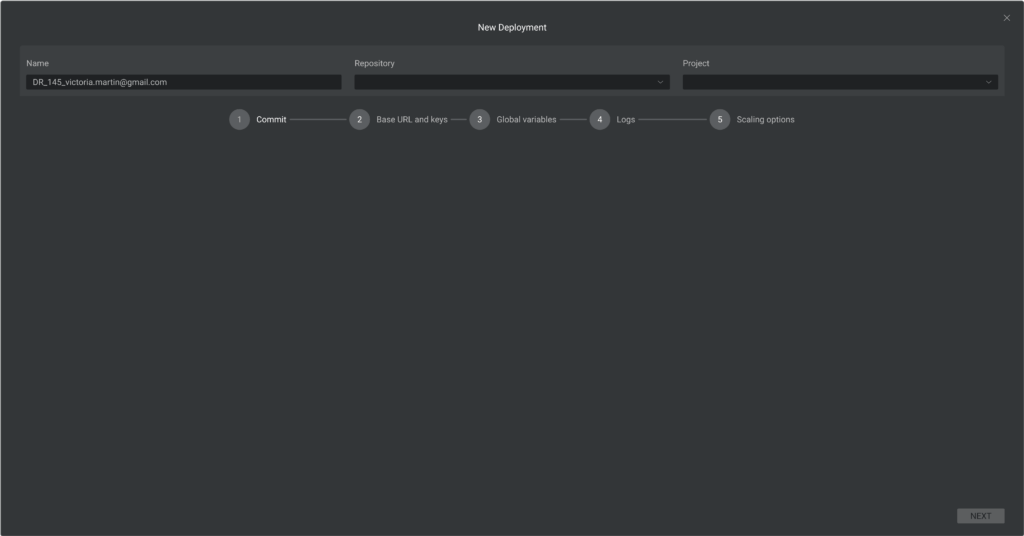
If you have already created repositories and projects, STEP 1 Сommit will become immediately available in the opening pop-up. By default, the first repository and the first project from the list of available options will be pre-selected, and the commits for this project will be displayed.
You can select the desired project from the list, and all existing commits of the selected project will be loaded. Choose the commit you want to deploy and click the NEXT button.
Before creating a new deployment, it is possible to view the specific commit in the IDE in viewer mode by clicking the VIEW button.
To see the difference in each commit, you need to select the desired commit and check the values of the old version and the new version in the Changes section.
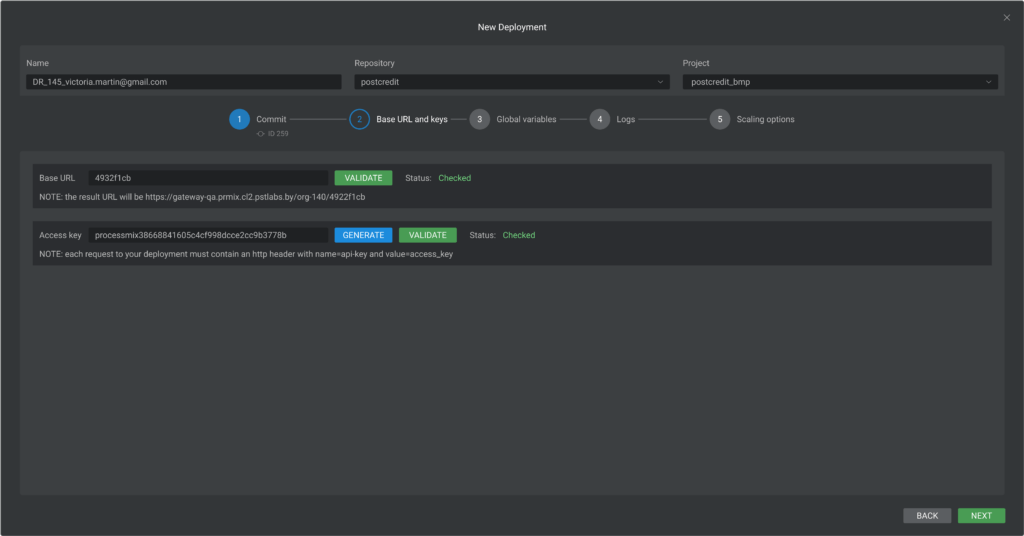
In STEP 2 Base URL and keys you can manually specify the Base URL and Access key using a specific format. After entering the data, you can check it by clicking on the VALIDATE button:
- if the base URL is not correct or the key is not registered on a system – the NEXT button is unavailable.
- if the base URL is correct and the key is registered on a system – you can use it and the NEXT button becomes available. Also, you can enter the key of another deployment.
By default, in Step 2, the Base URL and Access key are populated from the environment in which the deployment is being created. Status: Checked. The NEXT button is available.
If you do not want to use the default environment Access key, you can generate new one by click on the GENERATE button. The system will generate a key and after successful checking by click on the VALIDATE button, you will be able to proceed to the next step.
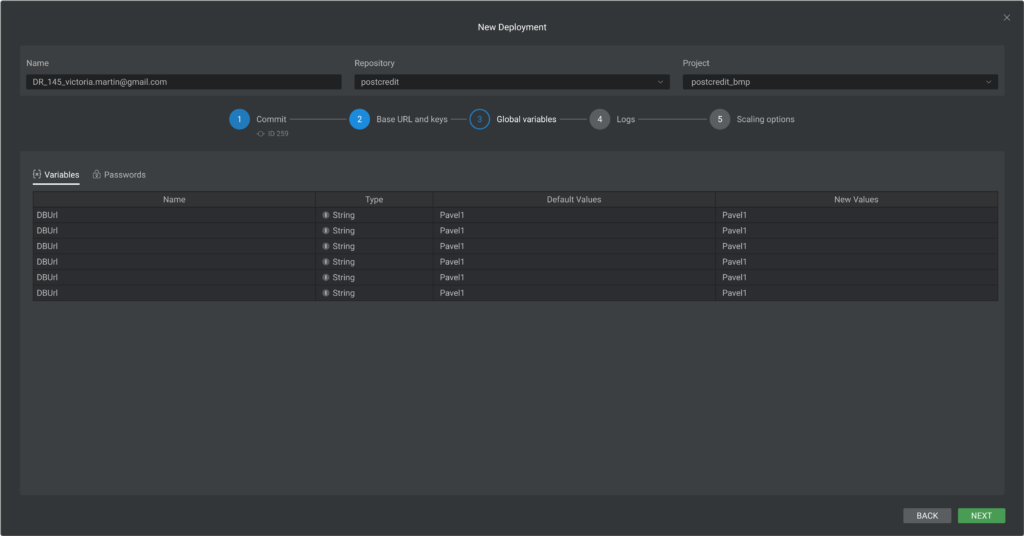
In STEP 3 Global variables you can reassign existing variables in the selected commit.
Global variables are constants set by the user in the IDE and are used to store data (variables, passwords) that should be available in any part of the system.
You can set a new variable value, but it is necessary to remember that it can affect the functioning of other parts of the system that already use this variable. Click on the NEXT button.
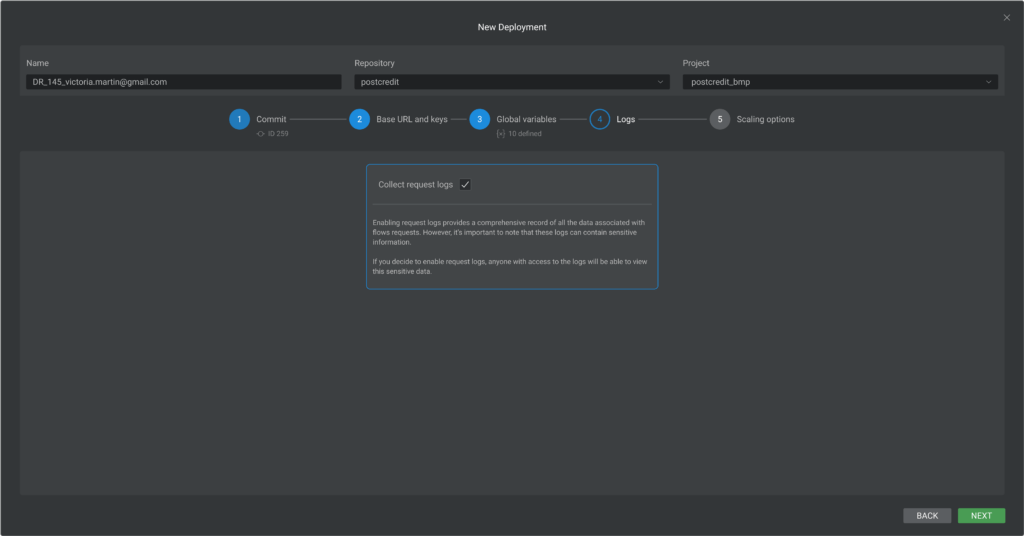
In STEP 4 Logs, you can turn on the Collection of request logs and click the NEXT button. By default, the collection of request logs is disabled.
Enabling request logs records all data associated with flow requests, but be aware that these logs may contain sensitive information. If request logs are enabled, anyone accessing them can view this sensitive data within the Request Logs.
In STEP 5 Scaling options, you can see a number of available slots that can be used for deployment. The availability of deployment slots depends on the allocated resources in your organization. The organization’s subscription and additional resources determine specific restrictions and the availability of free slots. For version 5.0 of ProcessMIX, only 1 slot is available for any deployment.
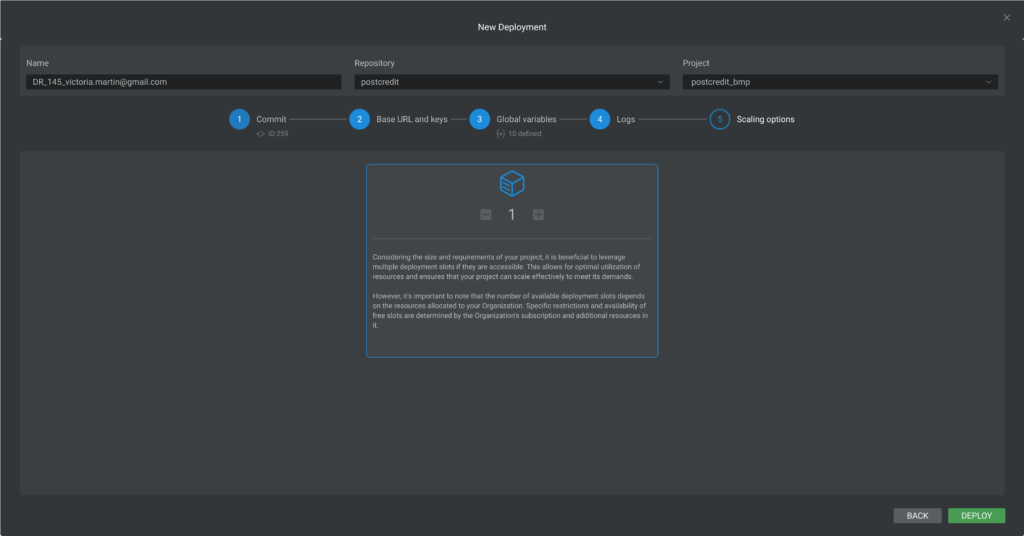
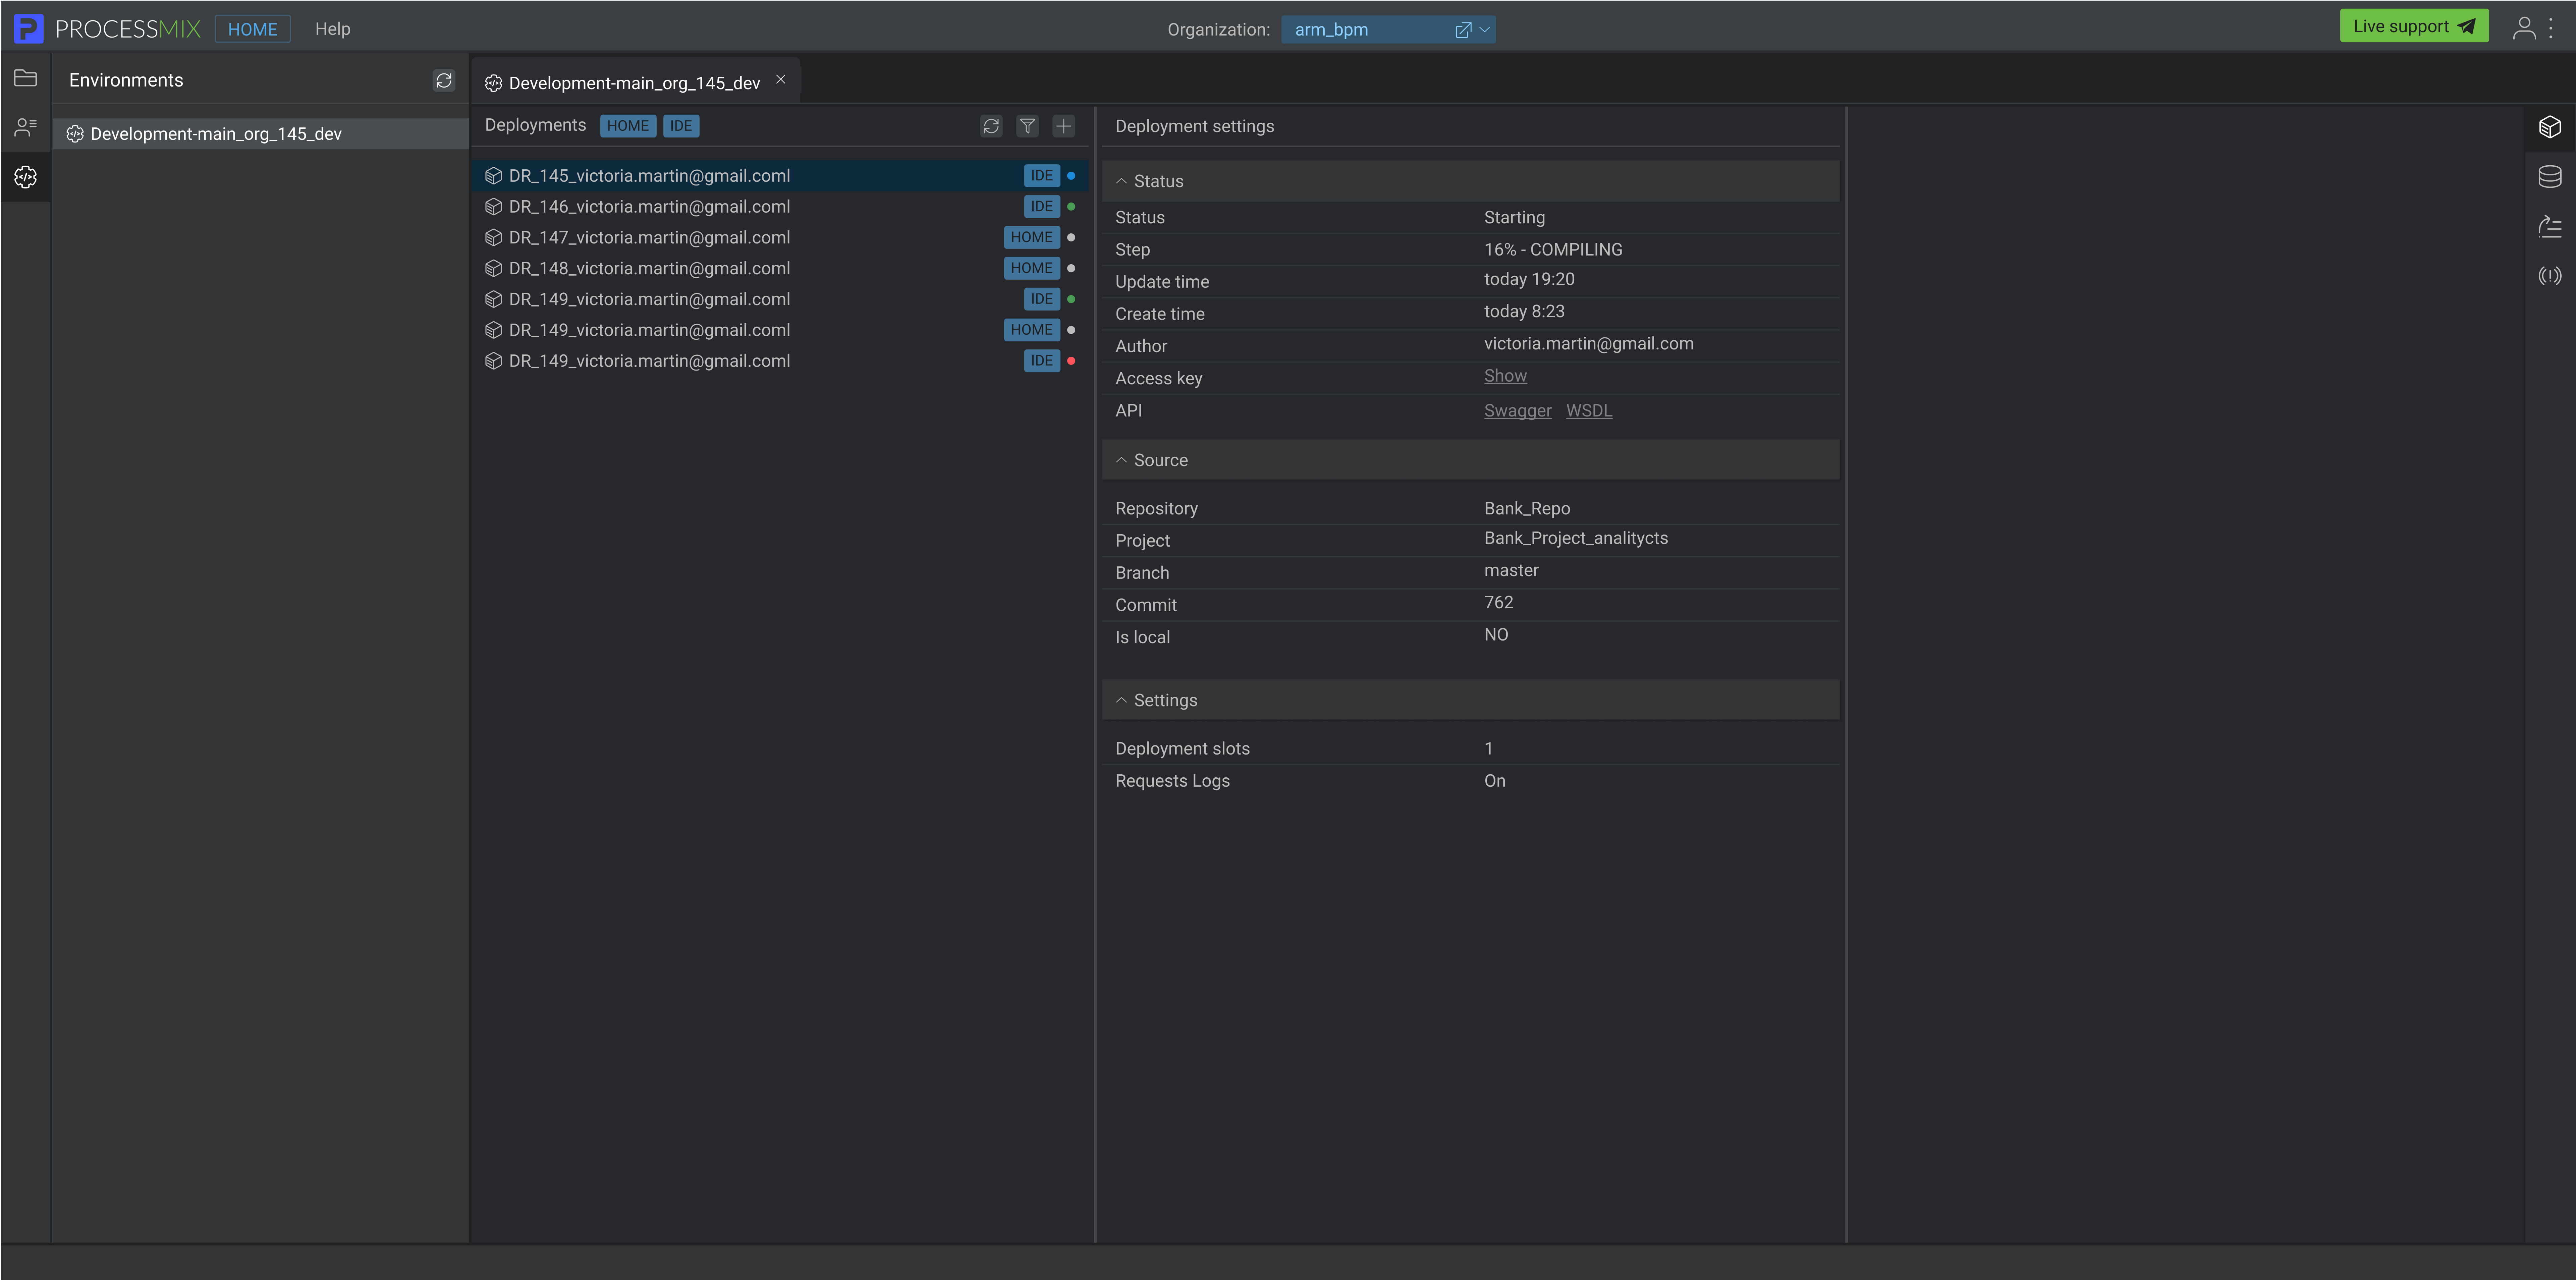
Once you are ready, click the DEPLOY button. The deployment process will be initiated with a Starting status.
The status of the deployment can be viewed in its settings. Additionally, a color indication corresponding to the statuses is displayed next to the deployment’s name.
Deployment statuses:
- Starting (blue circle) project deployment process is in progress.
- Running (green circle): project successfully deployed.
- Stopped (grey circle): deployment process is stopped.
- Failed (red circle): deployment process is failed.
If the deployment process ends with Failed status you can view the Errors & Warnings logs to check what happened during the system deployment process. You can also view Application logs which contain information about actions, events, and states occurring inside the system.
After the deployment process has been completed, the deployment status is Running.
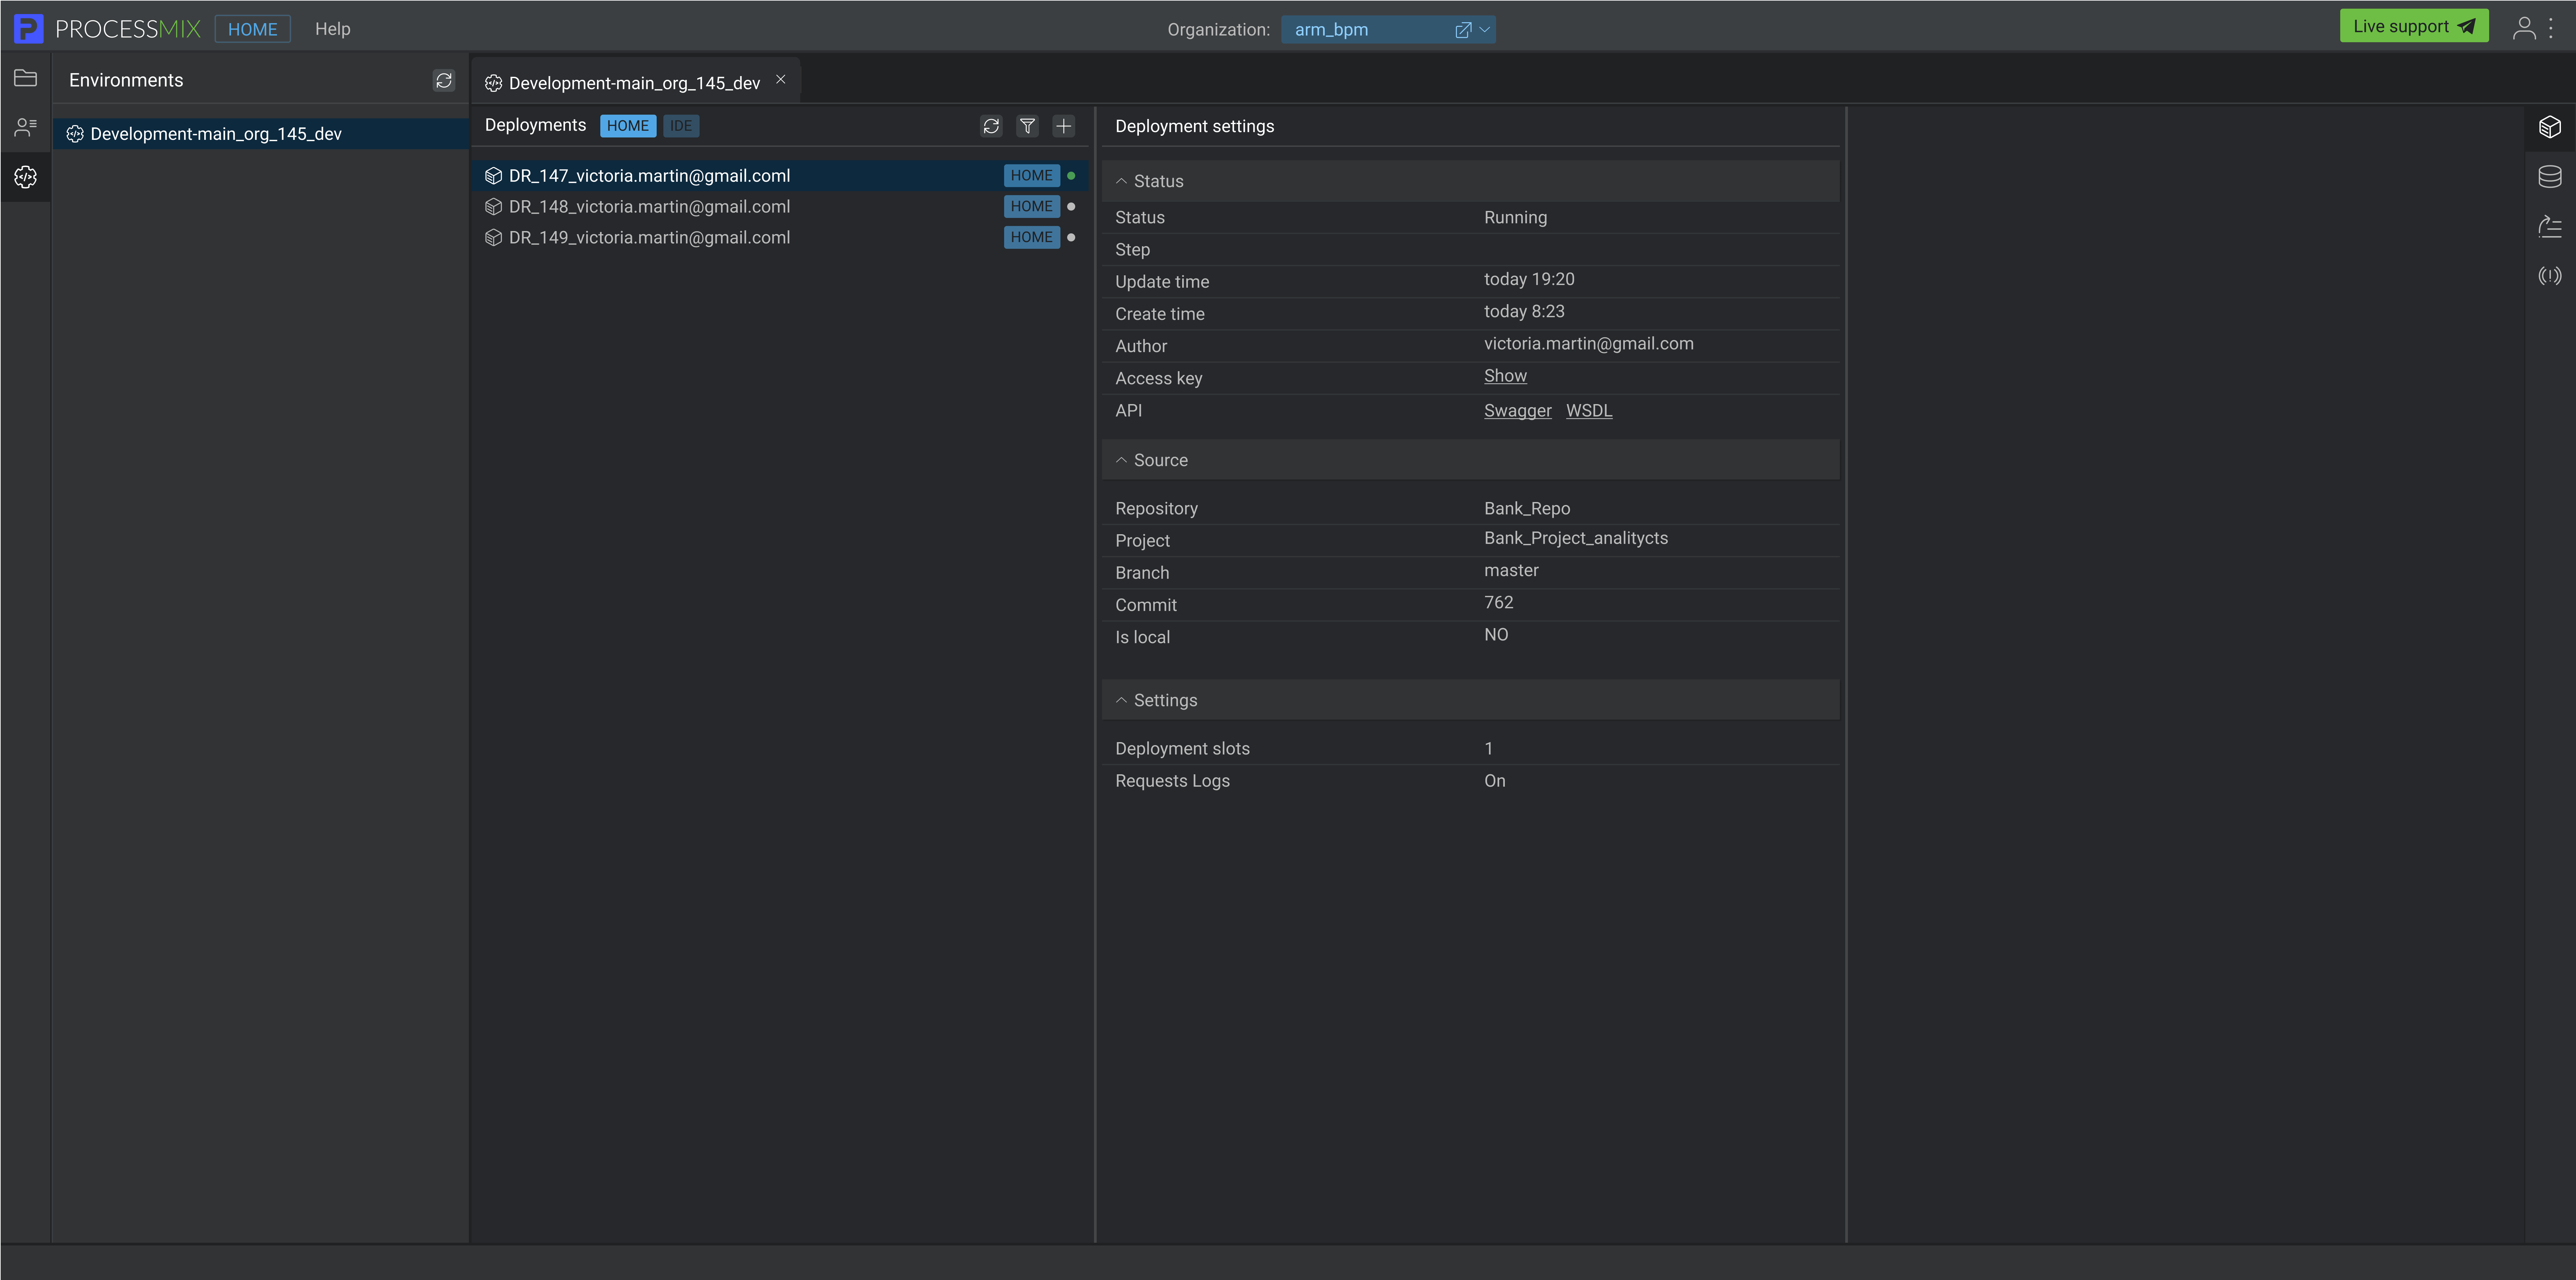
Each deployment has its own Access key. To obtain it, you need to click on the Show link located to the right of the Access key. You also get access to the Swagger and WSDL files. To obtain them, you need to click on the respective Swagger or WSDL link located to the right of the API.
To filter Deployments click on the Filter button  and enter the desired deployment name value in a field. After that, the results of the match will be presented in a general list.
You can filter deployments created via the IDE (default) and via HOME by clicking on the corresponding label in the Deployments section.
To update the list of Deployments, click on the Refresh button  .
.
To rename Deployments, select the Rename option in the context menu of the desired deployment. When the pop-up appears, you need to enter a new name in the input field and then click on the Rename button. The deployment’s name will be changed.
To delete a deployment, select the delete option in the context menu. The deployment will be stopped. The data remains in the Deployment section and database.
You cannot manage a deployment created in the IDE using the HOME application. You can only rename or delete it within HOME.
